
The Best Beginner Pyrography Project
Starting a New Hobby
Have you ever wanted to try wood burning? This is the best beginner pyrography project to get started wood burning! I am, by no means any authority on this craft, but I wanted to give it a try!
My sister got me a wood burning kit for my birthday last year. She knows that I love crafty things and thought that it might be something I would like to try. I had watched a lot of videos and read a lot of articles on how to get started, tips and tricks of how to use the wood burning tool. I researched the type of wood to use, types of images that are best to start with, what to use to seal it. So many articles gave conflicting information, or gave so much information that it seemed daunting!
Just start doing!
I decided to just put if all out of my head. I find that sometimes when you are trying something new, too much research can stop you from ever starting. You are afraid you are going to do the wrong thing, or that your project is going to be waste and not turn out.
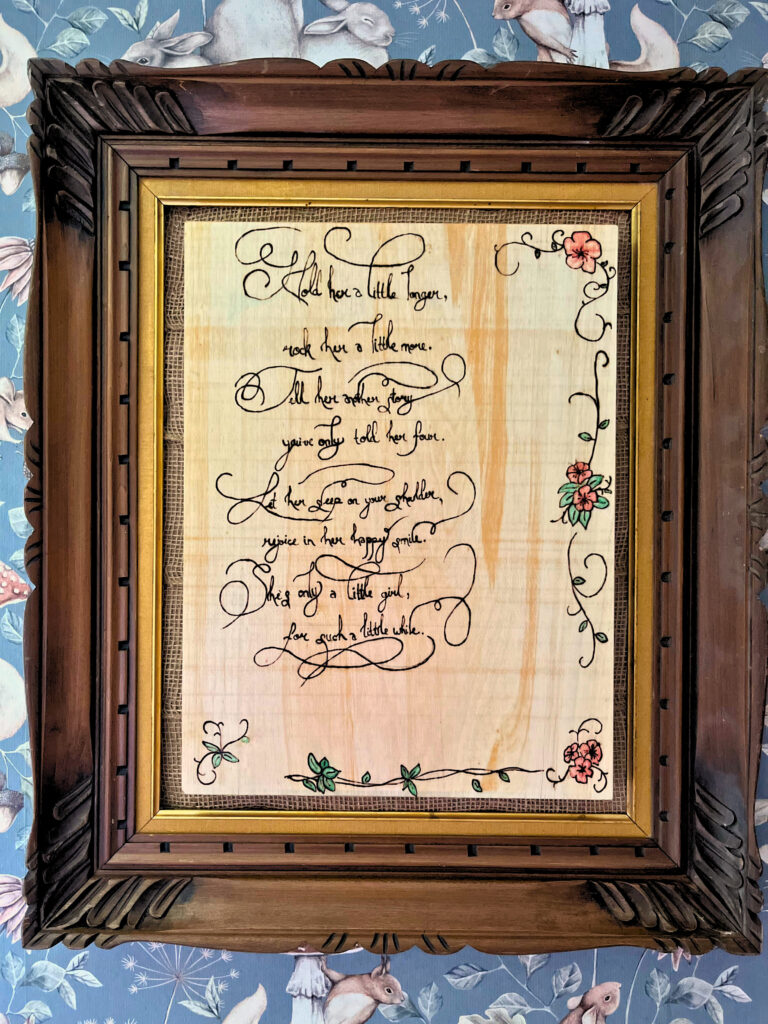
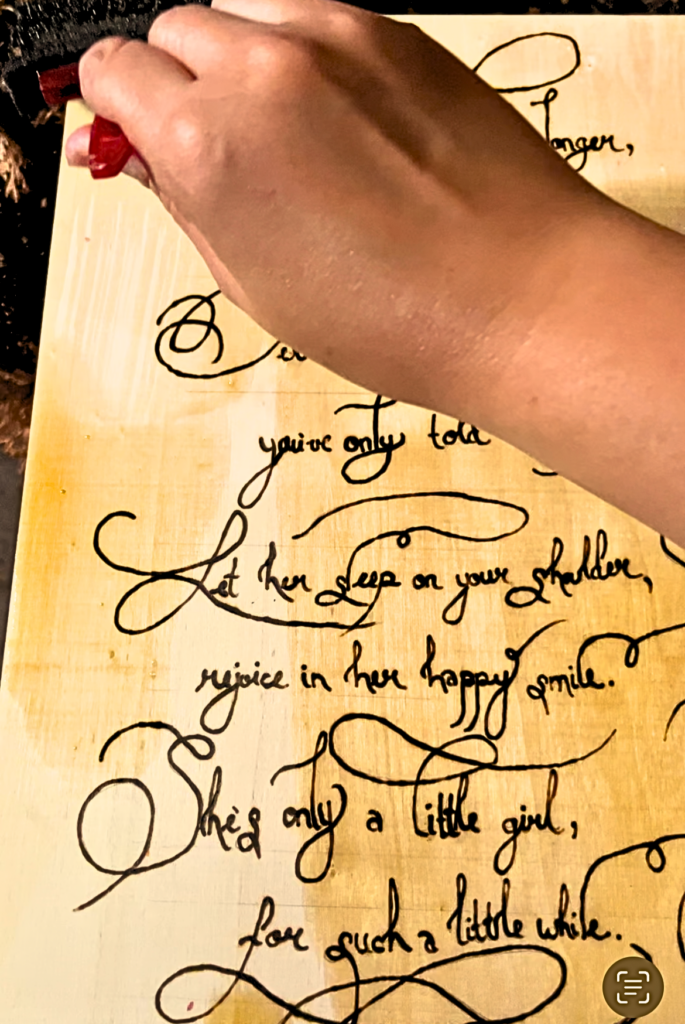
I just needed to get started, just try something and see what happens. No big deal if it doesn’t work out. I needed something very simple to gain some skills and knowledge. I decided on a simple poem as my beginner pyrography project. I used a cheap wooden canvas from the Dollar Store.
Getting started
If you think you want to get into the craft more seriously, you can purchase beginner sets of wood burning tools at most craft supply stores, and on-line as well. Another great resource is the library, mine has a lot of things you can borrow, not just books! We also have a community centre in town that does crafts and activities, and they happen to have a few wood burning tools! So, if you want to try it out, check some free resources in your town!
Supplies for The Best Beginner Pyrography Project
You will need:
Wood (I’m sure any piece of wood would do, as long as it has a smooth surface and has the look that you would like to display. Most sites recommended poplar. I used a wooden canvas from The Dollar Store.)
Wood burning tool
pencil crayon, or water colour (optional)
Wood stain, Danish oil (optional)
Process
Step 1
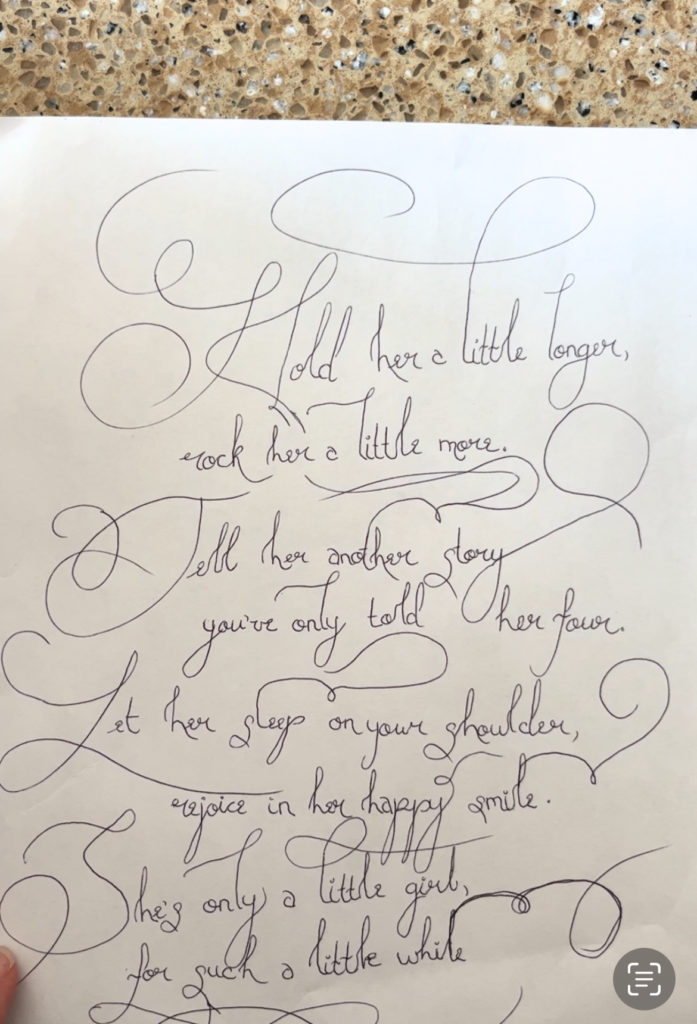
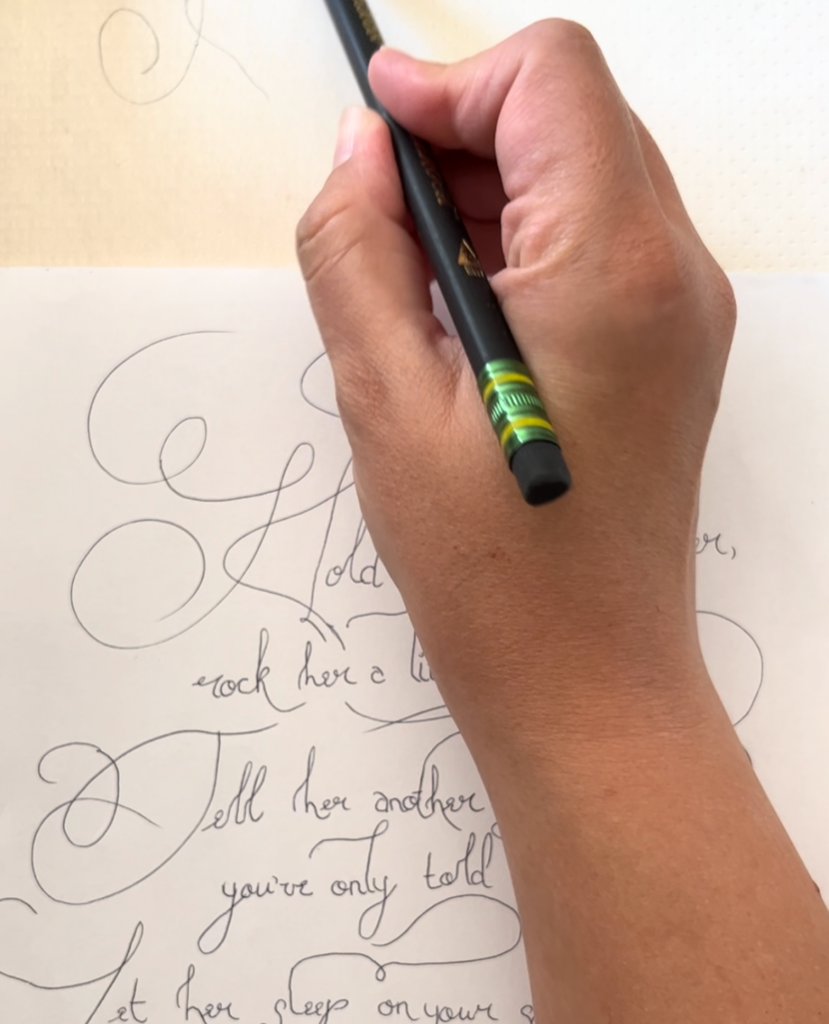
The first thing I did was try out my design on paper. I wanted the poem to actually look interesting so I did it in calligraphy with a bit of design around it. After making a few drafts and tweaks, I transferred it to my piece of wood. Some people say to transfer it to wood with graphite paper, if you have this that is a great way to be precise, but I did not. I simply used my pencil, very lightly, to recreate what I had on my paper. It worked out pretty well, but if your design is more intricate you may want to use the graphite paper.
Step 2
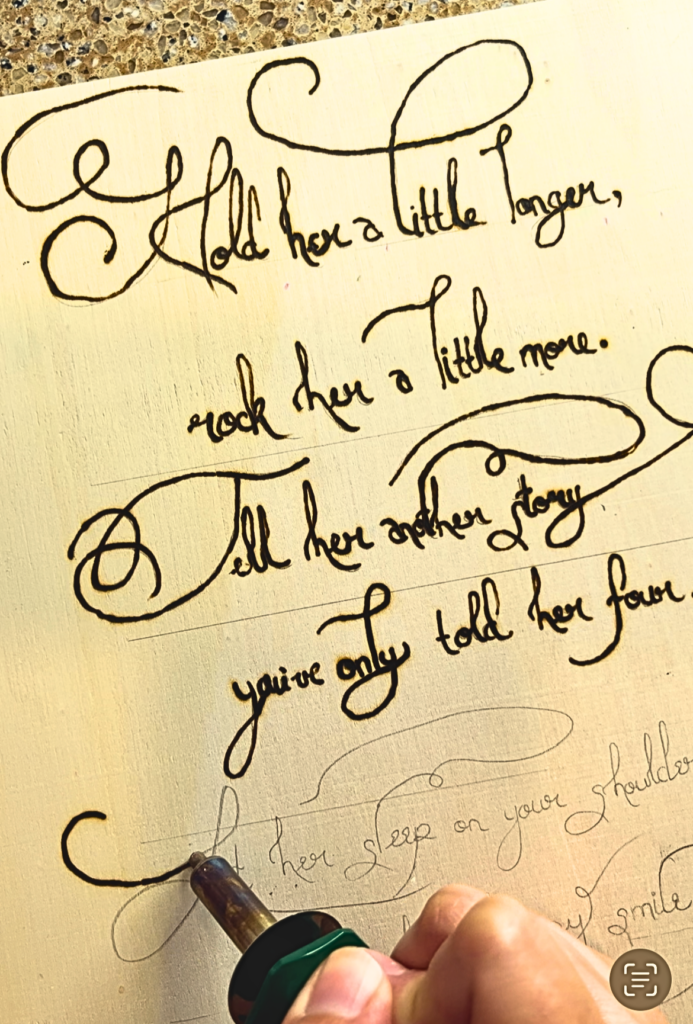
Next, heat up the wood burning tool. Make sure to read any instructions that come with your specific tool, as I am sure they vary. Mine came with a few different tips, you may want to test out, on a spare piece of wood, what they look like and which ones will work well for your design. Since mine was mostly writing, I decided on the one that looked most like a pencil with a rounded tip. Once the wood-burning tool was heated up, I tested it out on a spare piece of wood, to see what kind of marks it made, and how slow I needed to go to get the desired markings, etc.
Step 3
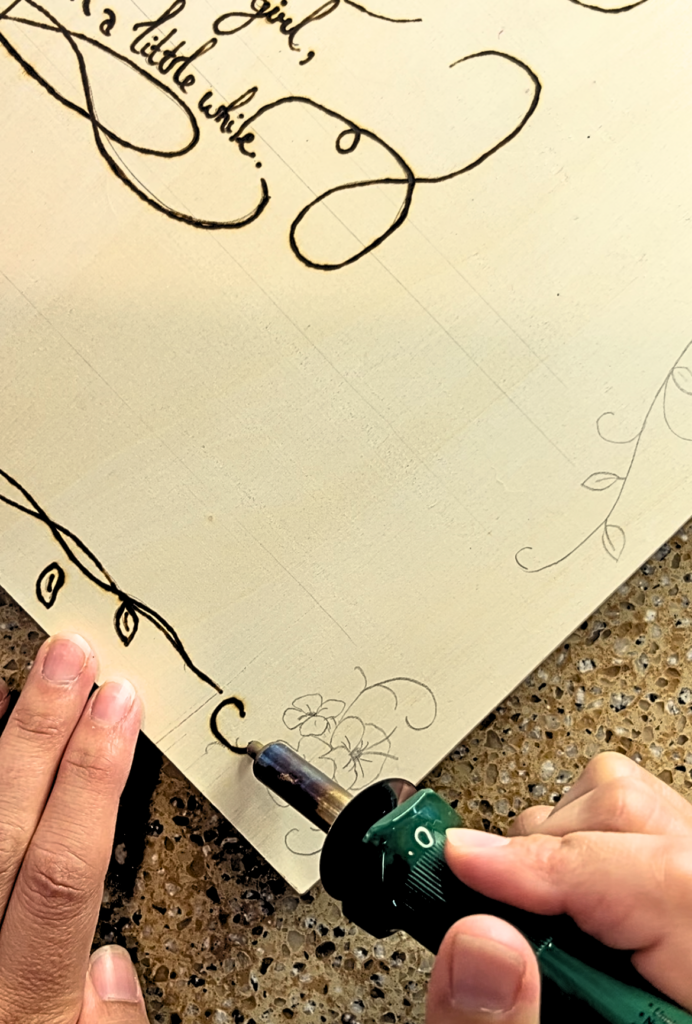
Then, I was ready to go! I, pretty slowly, traced the markings I made with my pencil. I found that after a little while, I needed to turn the tool slightly. The metal tip that was actually burning the wood would not be hot enough to make the same consistent markings, if I continued to use the exact same spot of the metal tip. If I turned it slightly, to a different side of the metal tip, it would continue to work as before. So I found that after, about, each word I would turn the tool slightly in my hand and then continue on. It didn’t take long for the spots on the metal tip to heat back up again, so if I just kept turning the tool, I did not have to stop and wait at all.
Also, near the end of the project, the tool was quite hot to hold onto! If you are going a longer project you would need to find some sort of barrier to hold on to. By the end of my project I could barely hold it with my fingers, and my project did not take long at all to complete. If you were going to get into this craft a little more seriously, you would need to look into finger protectors.
Step 4
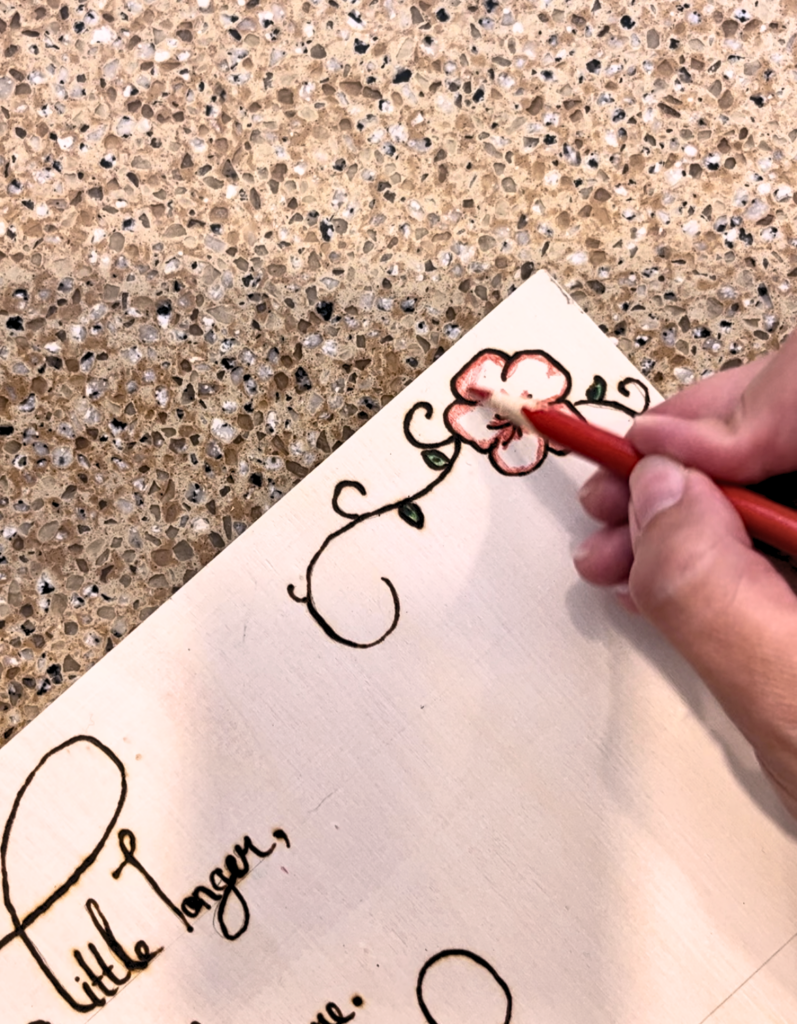
Once I was finished with the burning process, I turned off the tool and moved on to the coloured pencil. (It is extremely hot so make sure it is well out of the way of any children or pets) I had some flourishes on mine with flowers and leaves, so I wanted to give them a little colour. The coloured pencil looks nice, but I think I might try water colours next time. You do not need to add any colour at all if you don’t want to. Most of the projects I have seen on line are without colour. But since mine did not have as much of the wood burned as more advanced projects, I thought adding coloured would make it look a little more put together and finished.
Step 5
Finally, I brushed over whole thing with a few layers of Danish oil (in a well ventilated area). I had some left over from a project we recently finished in our basement for my husbands guitars. I don’t think it is strictly necessary to do this step. Once again, since my project had less of my wood burned, I thought this would make my project looked more finished.
I let it dry overnight and it was ready to hang up!
Are there any crafts that you would like to try out? I hope The best beginner pyrography project to get started with wood burning has inspired you to give something new a try!
Get inspired with more craft ideas with a nostalgic feel! Hop over here!
Join the vintage living community and gain access to the free printables library! Receive emails that you’ll love and recipes straight to your inbox!
Creating you own family recipe book has never been easier! Print fun recipe cards like this one at home for free!