

How to make homemade tart shells
Homemade tart shells are so much easier to eat and serve than slicing a pie. Tarts are easily hand held, no cutting or serving required. You don’t really even need a plate. Make multiple fillings and have a variety of desserts available without having to make an array of pies!
Do you need special tart tins?
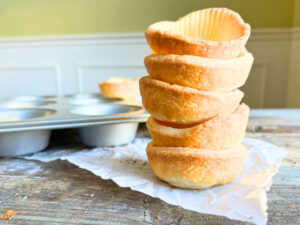
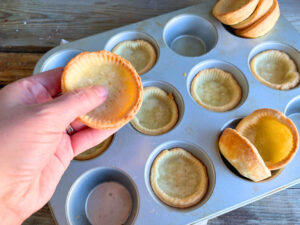
You do not! Make tart shells quickly and easily by using a muffin tin! The size, shape, and deepness of a muffin tin is just right for holding the perfect amount of filling!
TIP!
Want to try a tiny alternative? Use a greased Mason jar lid instead!
Dough for Tart Shells
This should come as no surprise, but the dough we use for making tarts is the same dough you use to make pies. For these tarts I’m going to be using my favourite pie dough recipe. It makes enough for 3 full pies. If you are looking to make fewer tarts, cut the recipe in half.
What is a tart?
Well, this can be different depending on where you are from.
A pie normally has a thin flaky pastry with a top and bottom crust.
A tart has a thicker, crumbly bottom crust with an open top.
However, a tart can also be a mini version of a pie. Kind of like a cupcake vs. cake and tart vs. pie.
So, what are we making today? This type of tart is going to be the mini pie version of the word tart.
Storage for tart shells
Freezing Tarts
Freeze baked tart shells for 3-6 months.
- Cool the tart shells to room temperature and remove from the tin.
- Freeze in a single layer in the freezer for 1 hour.
- Cut a small squares of parchment paper and place them in between the shells as you stack them together.
- Freeze in an airtight container and freeze for 3-6 months.
Refrigerating tart shells
Tart shells can be kept in the refrigerator for up to 5 days.
- Let the shells cool to room temperature.
- Cover and store them in the refrigerator for 5 days.
- If you need longer storage, store them in the freezer.
Room temperature tart shells
Unfilled baked tarts can be left at room temper in a container for 2 days. If you wish to store them for longer, the freezer is the best place to store baked tart shells.
Tart shell dough storage
Tart dough should be wrapped in cling-film and stored in an airtight container, in the refrigerator, for 3 days. For longer storage, wrapped in cling-film and store in an airtight container, in the freezer for 3 months.
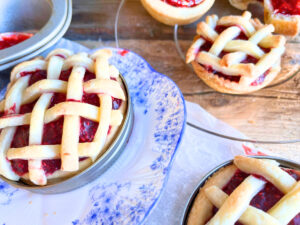
Making Tart shells
This mini pie tart is made with pie dough. There are specific tart tins you can buy to bake your tarts that normally have a removable bottom. However, since not everyone has these, me being one of them, we are going to make ours using muffin tins.
If you want to make smaller tarts you can also use a Mason jar lid! It has a removable bottom to help remove the pastry from the lid. To ensure nothing gets stuck, grease the inside of the lid before baking the pastry.

Tarts vs Tartlets
This is going to get confusing, because depending on where you are from they can mean the exact same thing or different things!
Tartlets are mini versions of a tart. Tarts are normally 9-11 in. (23-38 cm) in diameter. Tartlets are usually 2-3 in. (5-7 cm.). If you remember the earlier confusing situation covering what is a tart, you will remember that this is referring to the first description of tart vs pie.
In the second description of tart vs pie then tart and tartlet are the exact same thing. So, technically for this recipe we are making tartlets and tarts. Yikes! Who knew pastry could be so confusing!
I hope if you wanted to just make a tart shell, you skipped past all that and just moved on the the actual making of the tarts! Thank goodness for that jump to recipe button!
Quick Tip!
Make quick and easy desserts using store bought dough and pre made filling!
Ingredients For Homemade Tart shells
I am using the recipe from my big batch holiday pie dough. This makes enough for 3 double pie crusts. This is probably more than you want for tarts. Below I am going to cut the recipe in half. If you do need a lot of tarts the printable recipe card below will be the full big batch recipe.
2 ¾ cups all-purpose flour 330g
¾ teaspoons salt 3.75 ml
½ teaspoon baking powder 2.5 ml
1 ½ Tablespoons sugar 18 g
1 cup cold butter, cubed 227 g
½ Tablespoon vinegar 7 ml
1 egg
5-6 Tablespoons cold water (or until dough holds together) 75-90 ml
Method
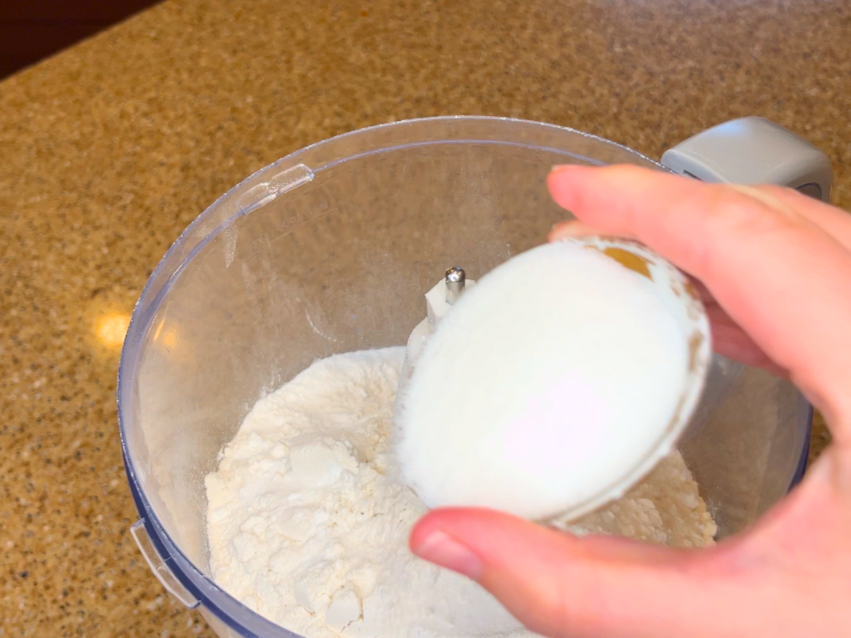
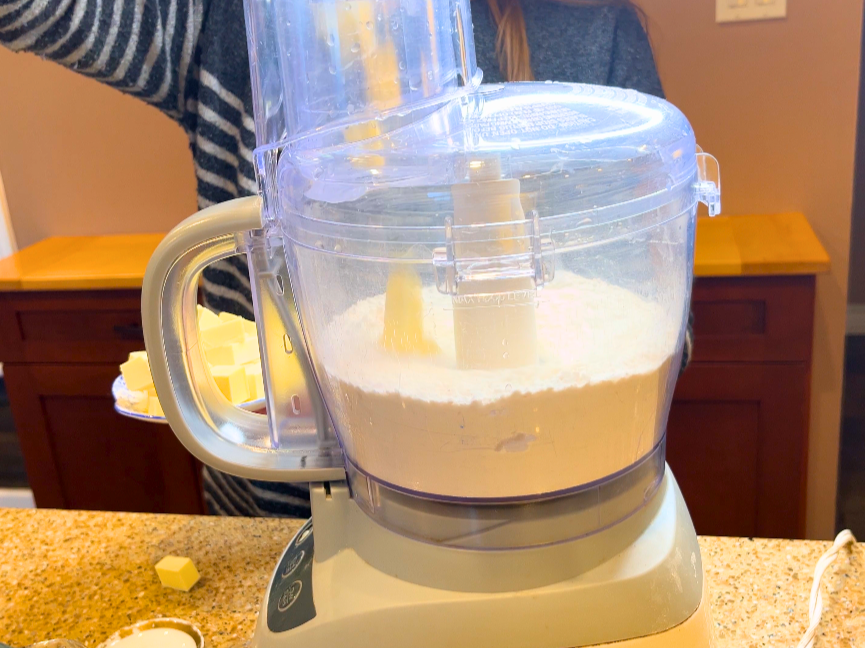
- In a food processor, or a large bowl by hand), add the flour, baking powder, sugar, and salt. Pulse to combine.
- With the food processor on low, drop in the cubes of butter, a little at a time. (If you are going by hand, cut in the butter with a pastry blender or rub between your fingers until it resembles a coarse meal.)
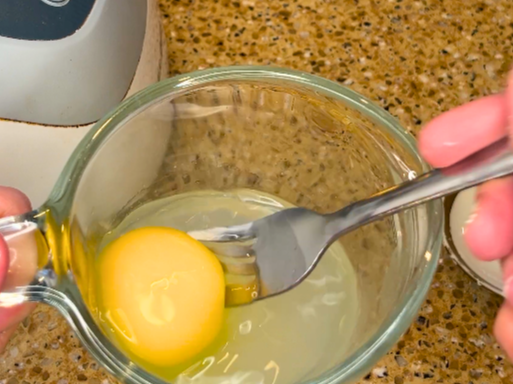
- In a small bowl, whisk the egg, vinegar and water.
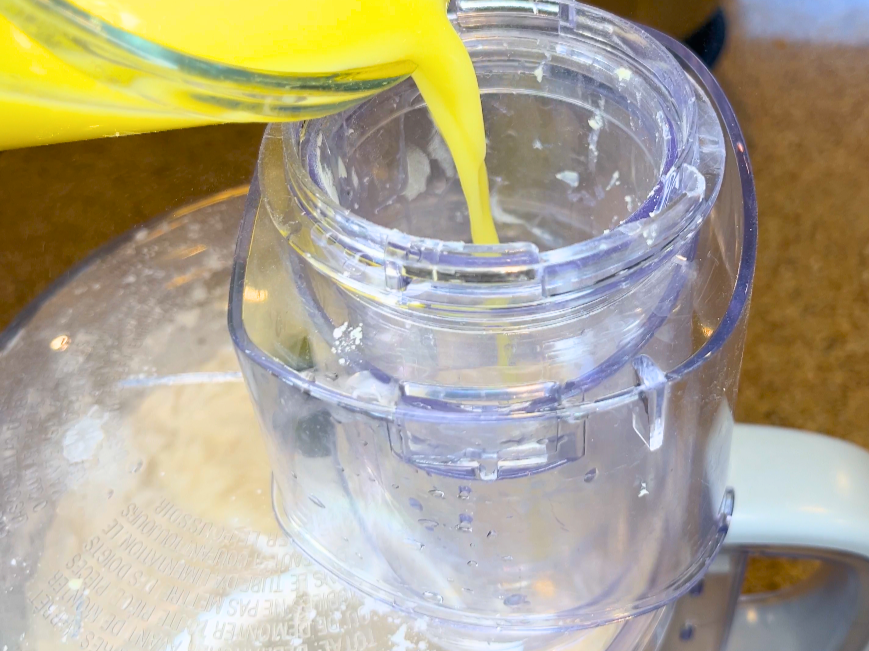
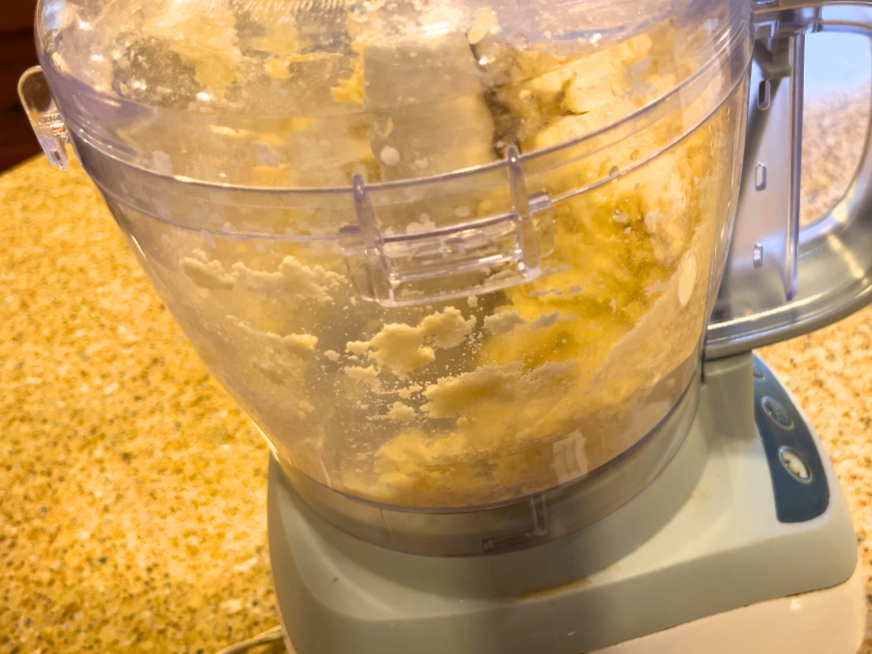
- With the food processor on low, gradually pour the mixture through the funnel until the dough just clumps together. Immediately turn the machine off.
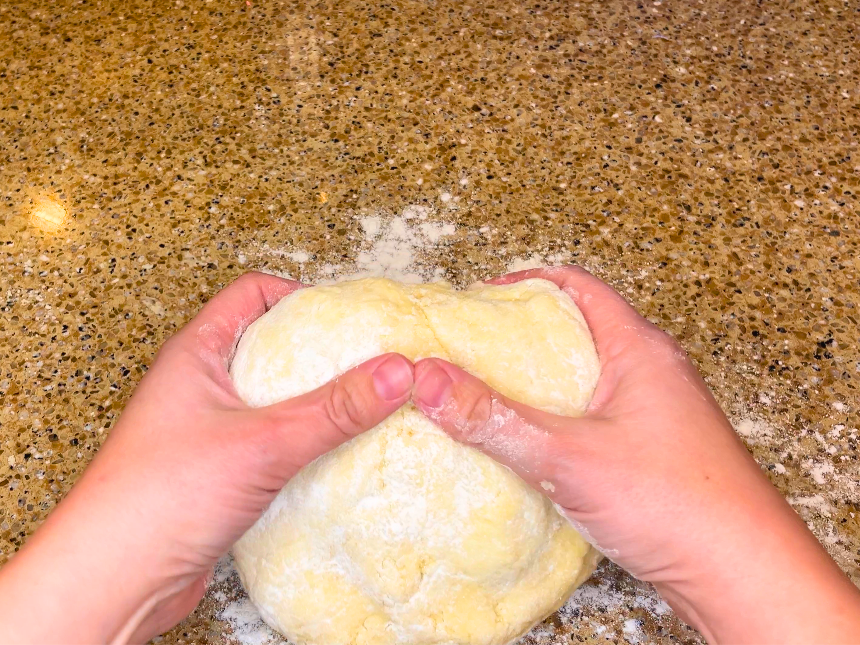
- Split the dough in half (unless you made the full recipe, then split in 4).
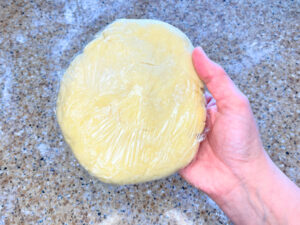
- Wrap in cling-film and chill 1 hour.
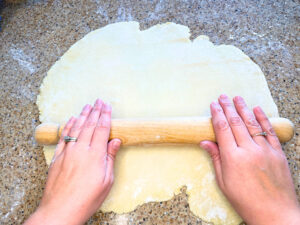
- Roll out the dough on a lightly floured surface. Make sure to turn and flip the dough. Reapply more flour as needed, to stop the dough from sticking.
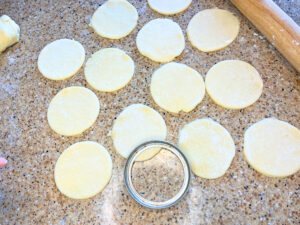
- Using a cookie cutter, biscuit cutter, or a mason jar lid. Something a little bigger than the muffin cup, cut out circles.
- Collect the dough back together, roll, and cut until all the dough is used up.
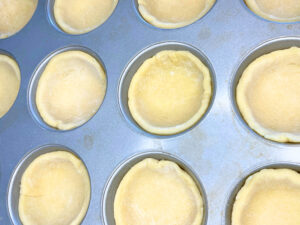
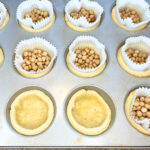
- Press the dough into the muffin cups, smoothing out the dough and forming it inside of the tin.
- Chill 1 hour.
- Preheat the oven to 325 ºF (160 ºC)
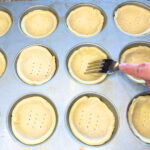
- Pierce holes in the bottom of the tarts.
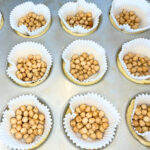
- Place a muffin liner in the inside of each shell and place some dried beans, rice, or pie weights in each one.
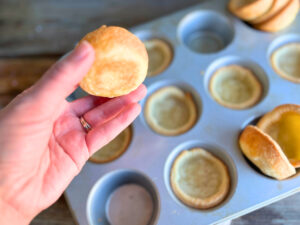
- Bake for 15 mins.
- Remove the muffin liners and weights. Bake another 8-10 mins or until lightly golden.
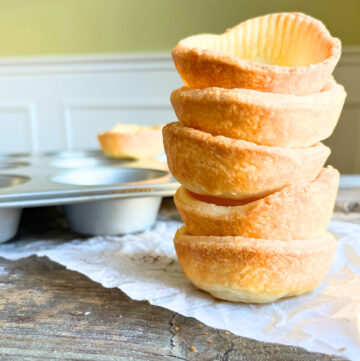
- Let cool. They are ready to fill!
Tart Shells – Tartlets
Equipment
- muffin tins
Ingredients
- 2 ¾ cups all-purpose flour 330 g
- ¾ teaspoons salt 3.75 ml
- ½ teaspoon baking powder 2.5 ml
- 1 ½ Tablespoons sugar 18 g
- 1 cup cold butter cubed 227 g
- 1 egg
- ½ Tablespoon vinegar 7 ml
- 5-6 Tablespoons cold water or until dough holds together 75-90 ml
Instructions
- In a food processor, (or a large bowl by hand), add the flour, baking powder, sugar, and salt. Pulse to combine.
- With the food processor on low, drop in the cubes of butter, a little at a time. (If you are going by hand, cut in the butter with a pastry blender or rub between your fingers until it resembles a coarse meal.)
- In a small bowl, whisk the egg, vinegar, and water.
- With the food processor on low, gradually pour the mixture through the funnel until the dough just clumps together. Immediately turn the machine off.
- Split the dough in half (unless you made the full recipe, then split in 4).
- Wrap in cling-film and chill 1 hour.
- Roll out the dough on a lightly floured surface. Make sure to turn and flip the dough. Reapply more flour as needed to stop the dough from sticking.
- Using a cookie cutter, biscuit cutter, or an upside down cup a little bigger than the muffin cups, cut out circles.
- Collect the dough back together, roll, and cut until all the dough is used up.
- Press the dough in to the muffin cups, smoothing out the dough and forming it to the inside of the tin.
- Chill 1 hour.
- Preheat the oven to 325 ºF (160 ºC)
- Pierce holes with a fork, in the bottom of the tart shells
- Place a muffin liner in the inside of each shell. Place some dried beans, rice, or pie weights in each one.
- Bake for 15 mins.
- Remove the muffin liners and weights. Bake another 8-10 mins or until lightly golden.
- Let cool. They are ready to fill!
Big Batch Holiday Pie dough
Ingredients
- 5½ cups all-purpose flour
- 1½ teaspoons salt
- 1 teaspoon baking powder
- 3 Tablespoons brown sugar
- 2 cups cold butter cubed
- 1 egg beaten
- 1 Tablespoon vinegar
- ⅔-¾ cups cold water
Instructions
- In a large bowl mix together flour, salt, baking powder, and brown sugar.
- Cut the cold butter into little cubes, about 1cm x 1cm.
- Mix the cubes into the flour mixture, then with your finger tips, rub the butter and flour through your fingers until it resembles coarse meal. (You can also use a pastry blender for this. If you are doing a smaller batch, you can pulse it in the food processor)
- Add the beaten egg.
- Mix the vinegar into the cold water and add it a little at a time, while you are mixing with your hands, until the dough holds together. (You may not need all of the water)
- Split the dough into portions (one for each pie), form each into a disk.
- Wrap each in cling-film and chill in the refrigerator for about 1 hour.
- Roll out and line pie plates. Chill in the fridge or freezer until ready for use. Then cook according to your pie recipe.
Looking for some fun pie pastry recipes?! These are some of my favourites! From Scratch Honey Apple Pie, The Best Old-Fashioned Apple Pie, The Perfect Pumpkin Pie.

One Comment