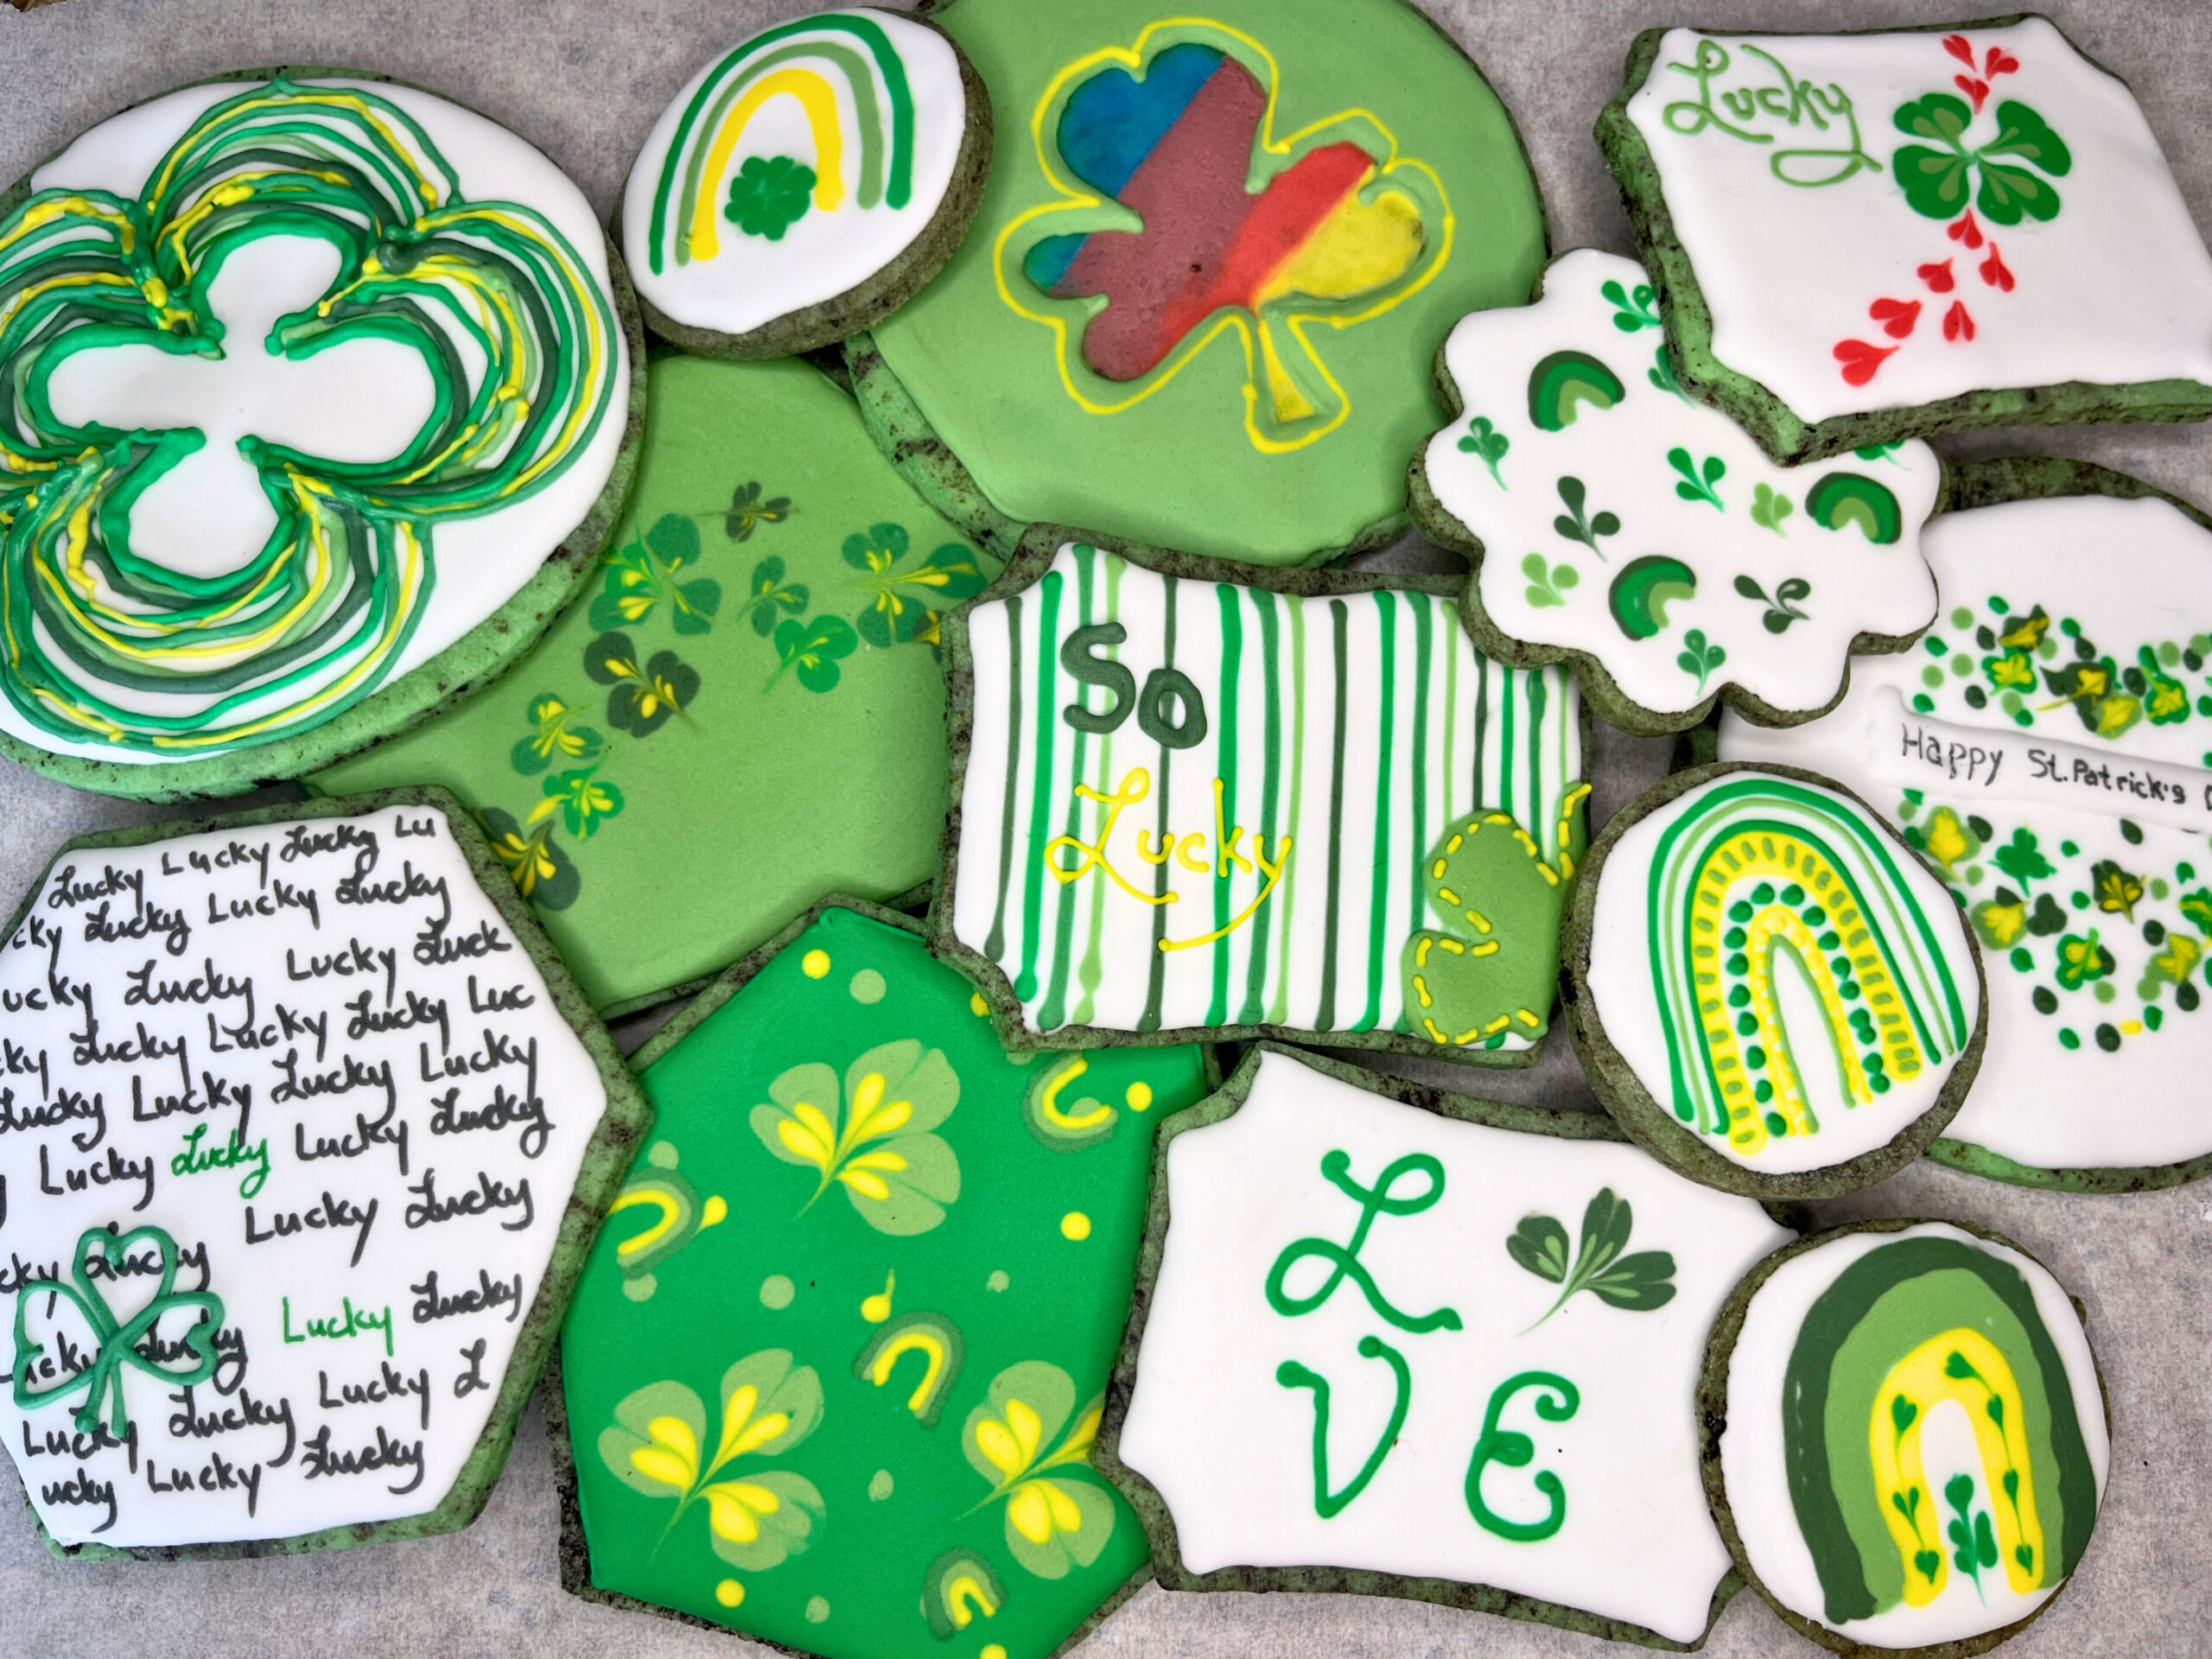
Easy St. Patrick’s Day Sugar Cookies
St. Patrick’s Day sugar cookies are a delicious treat to make for this fun holiday! Decorated sugar cookies are always a great choice because they last longer than most baked goods. Plus the icing dries hard so they are easy to package and handout.
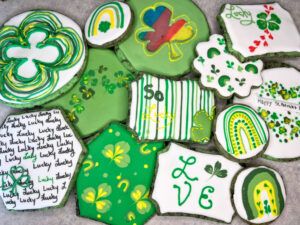
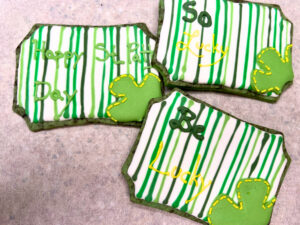
These cookies are beautiful, easy, and approachable. I didn’t use any special cookie cutters. You don’t need rainbows, leprechauns, shamrocks, or pots of gold to make a perfect St. Patrick’s Day sugar cookie collection!
- The list of recipes used for this collection can be found at the BOTTOM OF THE POST.
- There is a video compilation you can watch of the cookies being decorated at the BOTTOM FO THE POST!
These are my St. Patrick’s Day sugar cookies for this year! Hope you are able to find some inspiration! Happy Baking!
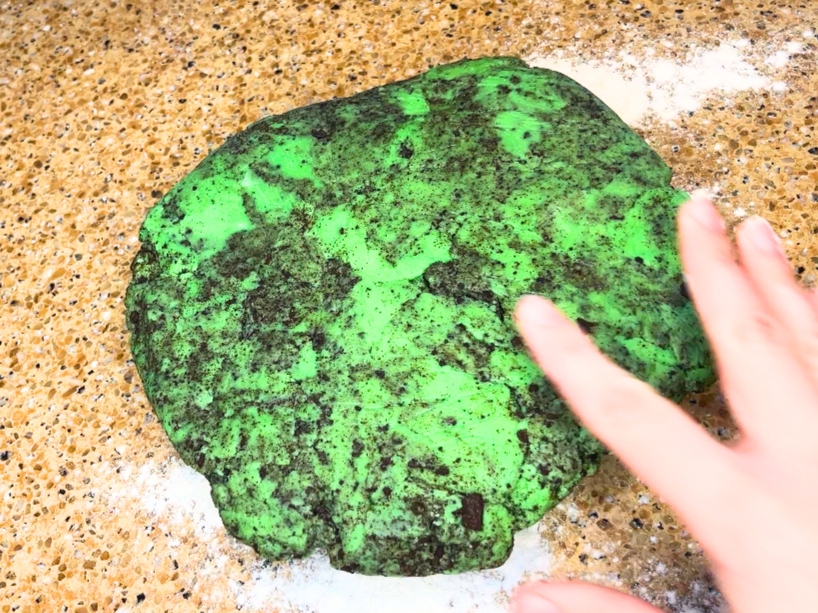
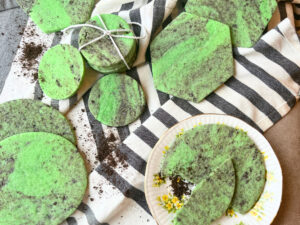
The Dough
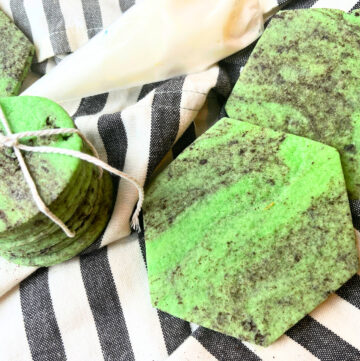
It’s green…obviously!
Do you need a special sugar cookie dough to make St. Patrick’s Day sugar cookies.. Absolutely not! But, I love coming up with new recipes so when I have the chance I take it! Plus, I make sugar cookies A LOT so it is a nice change of pace to have a new and exciting flavour to try!
Starting out, I wanted the cookies to be green .. of course. So I was immediately thinking mint. My kids absolutely love the chocolate sugar cookies I make so I thought I could combine the two and make a sort of homemade mint Oreo type cookie!
Instead of cocoa, which would turn the cookies brown, I thought I could use Oreo crumbles instead. They would hold their shape instead of just becoming part of the dough.
The result was a beautiful green marbled looking cookie. The taste of the mint and the Oreo crumbles really shines through! I think this might be in the permanent cookie rotation! So delicious!
Supplies you will need to make St. Patrick’s Day sugar cookies
I used only the items I already had at home. No need to buy any themed cookie cutters.
For this collection you will need:
- Your favourite sugar cookie recipe.
- A batch of royal icing. The main colours are tinted in 4 shades of green, white, yellow. You will also need a very small amount of red, blue, and purple.
- Cookie cutters. Any simple shapes are fine. I used circle, rectangle, hexagon, and a scalloped circle. (If you don’t have cookie cutters you could just roll the dough out and cut it into squares with a knife or circles with an upside down cup.)
- Piping bags. I used the plastic bags that you cut a small opening in the bottom.
- A scribe (or a small skewer, toothpick, or darning needle).
St. Patrick’s Day rainbow cookies without a special cookie cutter!
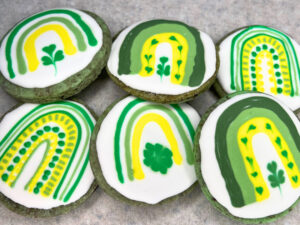
Use any shape you like and make a rainbow using the different Shades of green and yellow instead of the traditional multicoloured rainbow. For added interest add some different design to the rainbow, like dots and dashes.
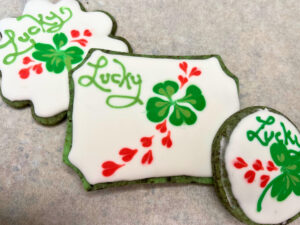
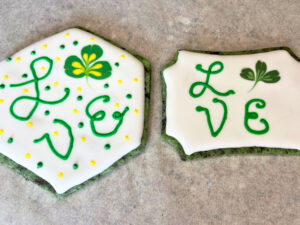
How to make a shamrock with royal icing
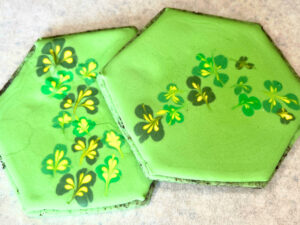
You can make a cute little clover using the wet-on-wet technique of decorating with royal icing. After you have the background of the cookie flooded, pipe flood consistency ovals with the widest part of each of the shamrock leaves going side-to-side.
Place a small dot of a contrasting colour in the centre (such as yellow or a lighter green). Using a scribe (small skewer, toothpick, or darning needle), swipe down from the top of each side oval, towards the centre of the shamrock.
Lastly, with the top leaf, swipe down from the top towards the centre of the clover but continue on a little bit past the two side leaves to create a stem.
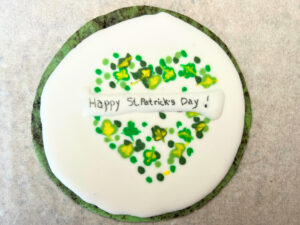
How to make hearts with royal icing
You can make different size hearts using the wet-on-wet technique of decorating with royal icing. After you have the background of the cookie flooded, pipe ovals, circles, or dots with your flood consistency icing.
Using a scribe (small skewer, toothpick, or darning needle), starting just above the circle, make a gentle swipe down and through the centre of the circle. End just below the circle.
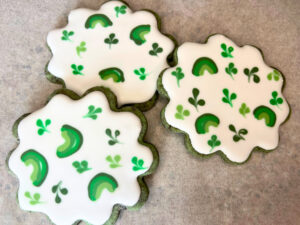
How to make a rainbow design under the royal icing
Using the blue, purple, yellow, and red make a large blob of each colour, going from top to bottom. Take a knife or spatula and, in one gentle motion, spread the colours across horizontally. This should leave you will a rainbow looking swipe over the base of the cookie.
You can now use the boarder consistency icing to pipe whatever design you would like to show through on top of the icing. Flood around the design to leave the peak-a-boo rainbow shinning through!
How to pipe letters with royal icing

I like to use boarder consistency icing because it sits nicely on top of the base flood icing and doesn’t spread.
Cut a very small and clean hole in the bottom of the piping bag. Practice a few times first. Then pipe your letters on the cookie. Make sure the icing touches down every time you have a directional change.
How to write on royal icing
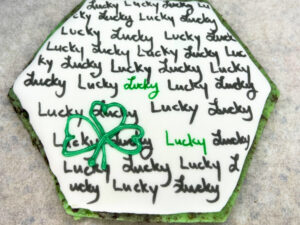
Food writers can be purchased from most craft supply or baking supply stores. This uses food safe pens that you can use to decorate your baked goods!
To use these on royal icing, you must wait 24 hours for the icing to fully dry. Gently, write or draw your design over top of the icing!
How to make raised designs on your St. Patrick’s Day sugar cookies
To make a more 3-D effect and have some raised icing designs, flood the background of the cookie first. Make sure to allow this icing to dry partially, (2-3 hours).
Using a piping consistency icing, draw out the desired design. Flood this with flood consistency icing. This second icing will be raised above the original layer of icing.
Mint Oreo Crumble Sugar Cookies
Equipment
- 1 cookie cutters
Ingredients
- 1 cup butter softened 227 g
- 1 ¾ cup white sugar 350 g
- ¼ cup corn syrup 60 g
- 1 teaspoon vanilla extract 5 g
- 1 teaspoon mint extract 5 g
- 2 eggs
- 1 teaspoon baking powder 5 g
- 1 teaspoon salt 5 g
- A few drops of green food colouring optional
- 4 cups all-purpose flour 500 g
- ¾ cup Oreo crumbles 95 g
Instructions
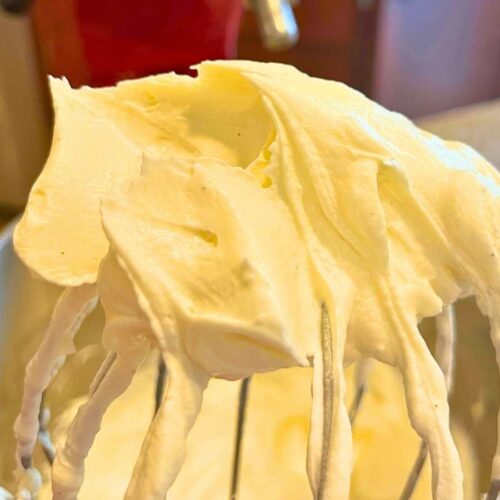
- In the bowl of a stand mixer with the paddle attachment, or in a large bowl with beaters, cream the butter.
- Add in the sugar and cream this along with the butter until light and airy.
- Add in the eggs, one at a time, and beat after each addition.
- Mix in the corn syrup, vanilla, peppermint extract, and green food colouring.
- Stir in the baking powder and salt.
- Stir in the flour until the dough just comes together.
- Add in the Oreo crumbles and stir just slightly to bring them into the dough. They should not be fully incorporated just a few swirls throughout the dough. This will leave a green cookie with some swirls of chocolate cookie throughout. If you fully mix in the crumbles, you will end up with a greyish green cookie.
- Flatten the dough into a disk and wrap in cling-film.
- Chill the dough in the refrigerator for 1 hour.
- On a lightly floured counter roll the dough out. Make sure to move and flip the dough around to make sure it doesn’t stick to the counter or the rolling pin. Apply a dusting of flour as needed.
- Cut the dough out with cookie cutters.
- Place the dough cutouts on a lined cookie sheet.
- Chill in the freezer for 30 minutes.
- Meanwhile, preheat the oven to 350 ºF (180 ºC).
- Bake the cookies for 9-12 minutes or until fully set.
- Remove from the oven and allow to cool on the tray 10 minutes. Then remove to a wire rack to cool completely.


Royal Icing
Ingredients
- 2 lbs. of icing sugar
- 5 Tablespoons meringue powder
- ⅔ cup warm water. You may need more or less to reach the proper consistency
Instructions
- In the bowl of the stand mixer, with the paddle attachment, add the sugar and the meringue powder.
- Mix to combine and break up any lumps.
- Add the water and mix on low until the icing starts to come together.
- Turn the mixer up to medium and beat for 4-5 mins, or until light and fluffy and holds a stiff peak. (You may need to add more water to reach the desired consistency for the piping.)
- Keep your icing covered, either with cling-film or a damp cloth, when not in use, or it will start to dry and set.
- The stiff consistency is perfect for making things like royal icing flowers or piping 3 dimensional designs.
- For the consistency for writing or piping borders, the consistency should be similar to mayonnaise. (You gradually add water to the icing until this is reached.)
- For flood consistency, (this is the main inside icing you will be filling the cookie with), add water gradually, until you have a runny honey consistency.
Simple Buttercream Icing
Ingredients
- ½ cup butter softened
- 4 cups icing sugar
- 3 Tablespoons cream
- 2 teaspoons vanilla
- ¼ teaspoon salt
Instructions
- In the bowl of a stand mixer, with the whisk attachment, cream butter.
- Add icing sugar. Mix on the lowest setting, until all of the sugar is incorporated. Then cream on medium-high until light and fluffy.
- Add vanilla and salt. Blend into the icing.
- Thin with cream, you may need more or less, until you have the desired consistency.