

Easy Mint Shortbread Christmas Cookies
Updated December 5, 2024
I love mint shortbread cookies, especially at Christmas. These are always on my holiday baking list. Mint cookies show up every year in the Christmas cookie boxes we hand out and people always rave about them.
These cookies are so easy to make, with just a few simple kitchen staples. Better yet, you can make the dough ahead of time. When you want to bake them, slice into cookies and bake! So simple.

Making Mint Shortbread Cookies ahead of time
I often make batches of cookies, when I have time, during the holiday season. I will leave out some to snack on and the rest I will freeze for later. That way, I am ready to go when I need to make Christmas cookie tins, attend a holiday party, or have a friend stop by!
Freezing the dough
For these cookies, you can freeze the dough two different ways. Make the dough into a log shape. Wrap completely in plastic wrap and place in a freezer bag (or air-tight container). Store in the freezer for 3-4 months.
Alternatively, you could slice the log into individual cookies, lay them out on a cookie sheet and freeze for 2-3 hours. Transfer the unbaked cookies into a freezer bag, or air-tight container, and store in the freezer for 3-4 months.
Freezing baked mint shortbread cookies
This is what I typically do to get a head start on my holiday baking.
- After the cookies are baked, cool them to room temperature.
- Freeze in a single layer, on a cookie sheet, for 2-3 hours.
- Place them into a freezer bag, or air-tight container.
- Store in the freezer for 3-4 months.

Decorating Mint Shortbread Cookies
Decorating cookies is a great way to make simple cookies look fun and festive! Especially if you are giving them as gifts or taking to a holiday party.
Mint Candy Melts
I love using candy melts for decorating Christmas cookies. They come in a huge assortment of colours and flavours, perfect for whatever cookies you want to decorate.
Simply melt according to the package directions
Melted Mint Chocolate
To melt the mint chocolate chips you can either use a double boiler, melt in short bursts in the microwave, or use a small crockpot.
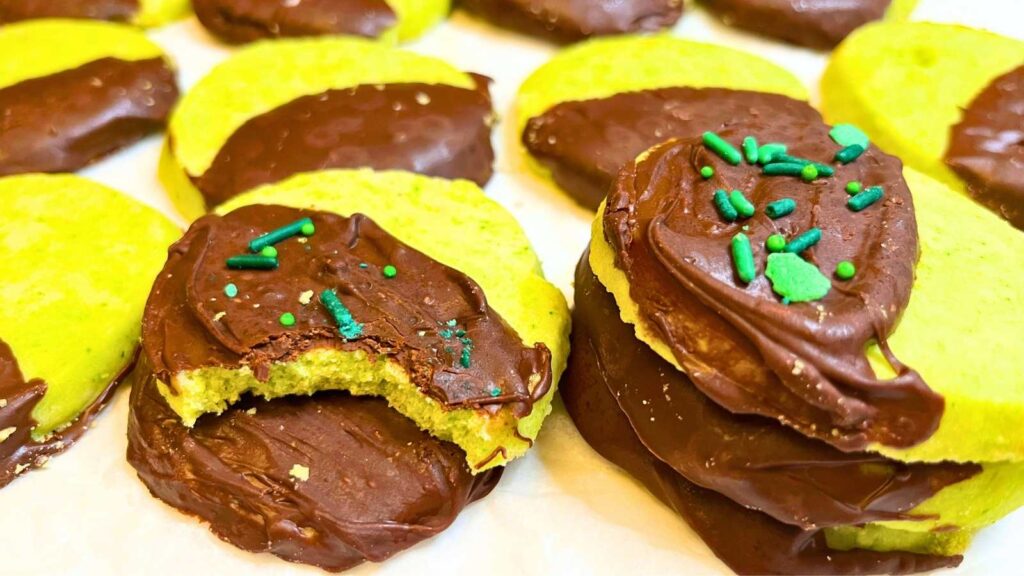
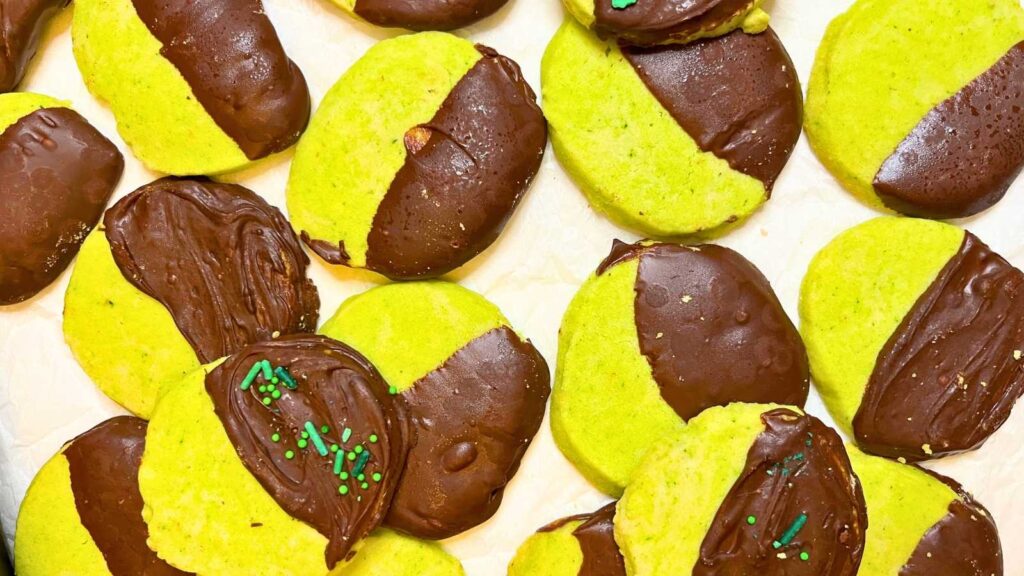
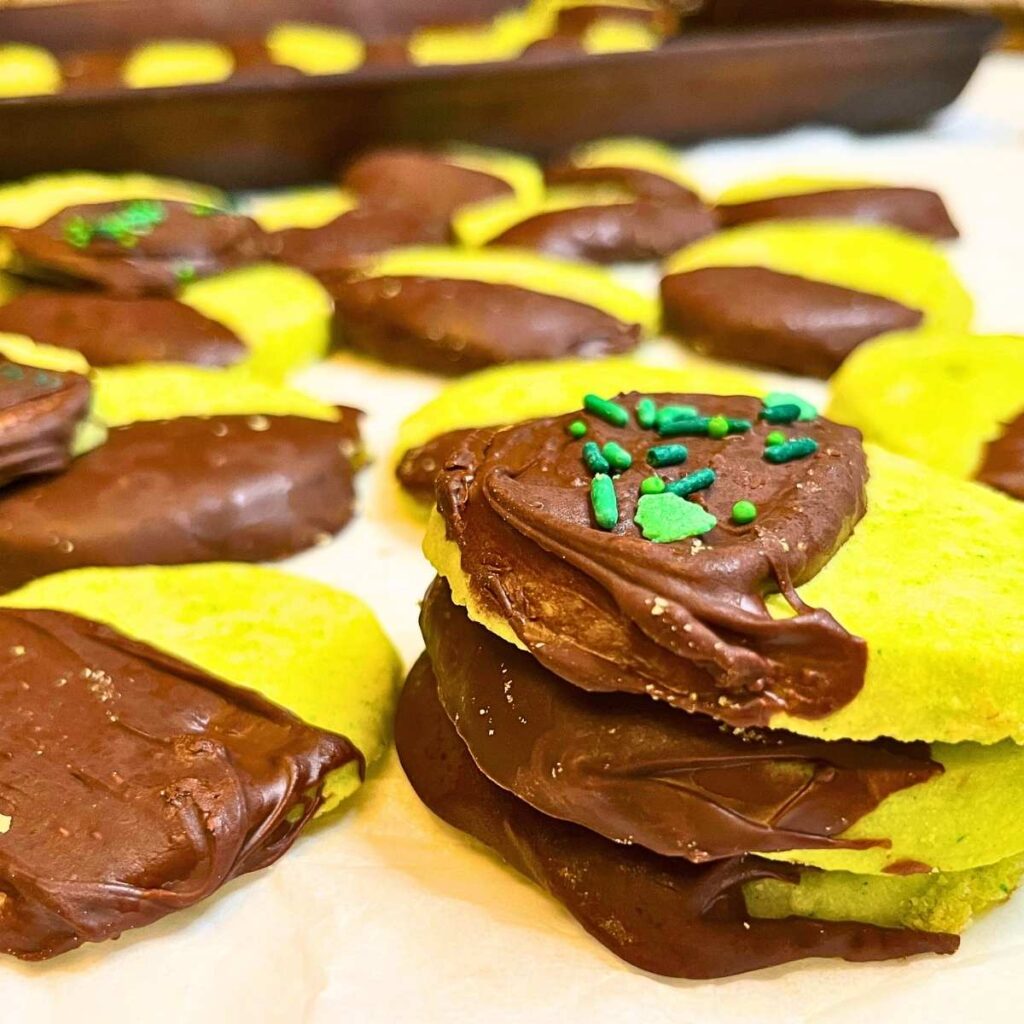
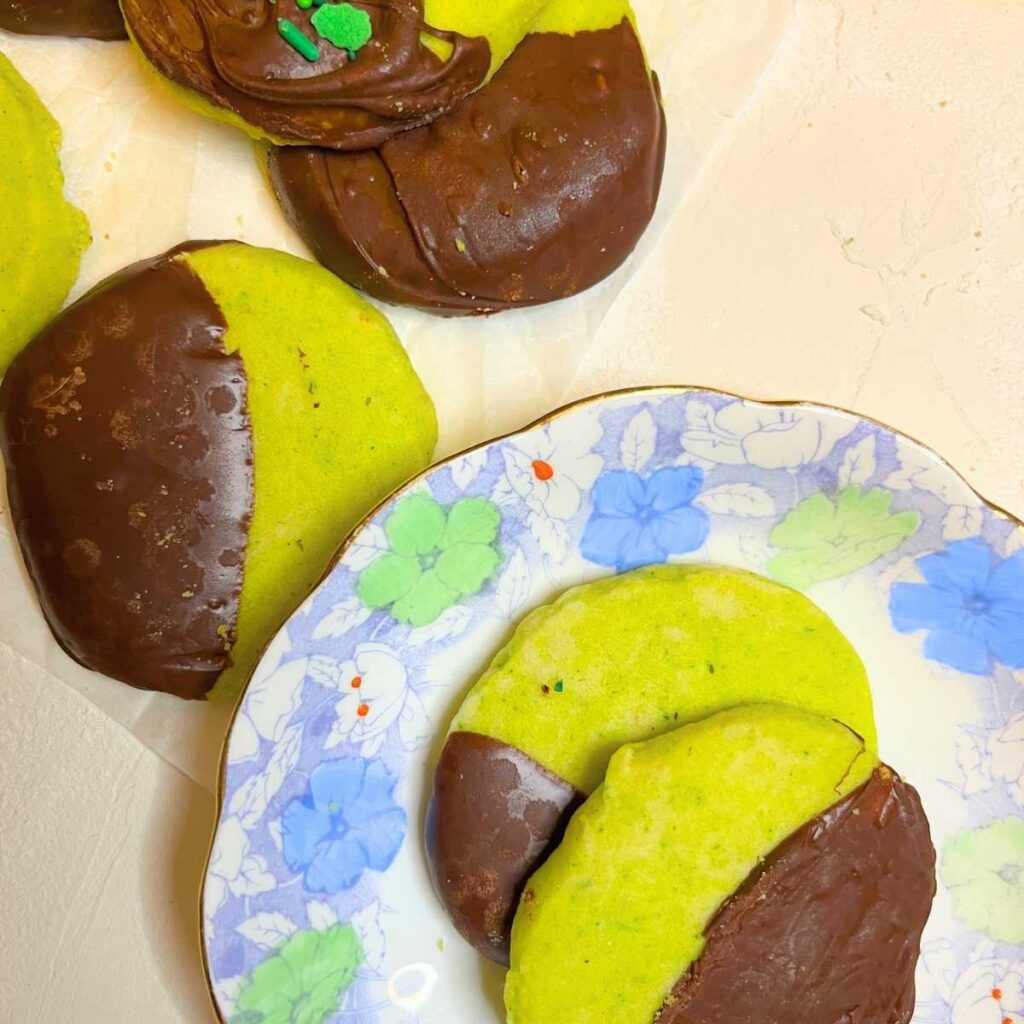
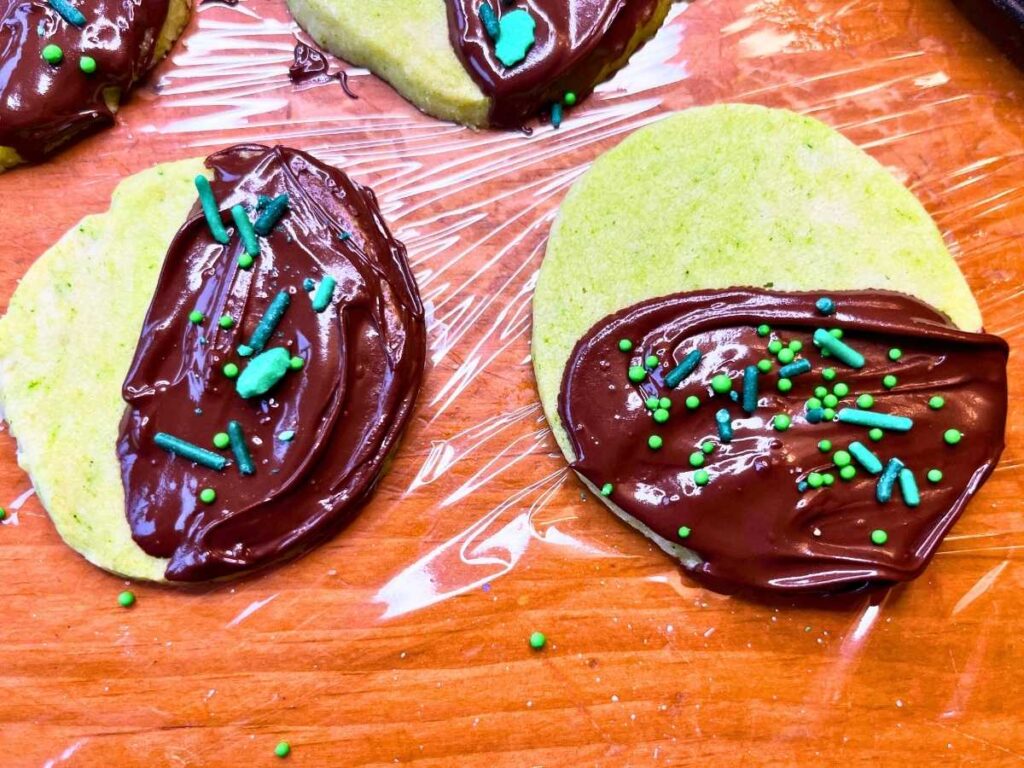
To decorate the cookies, either place the melted chocolate or candy melts in a small bowl and dip the corner of each cookie. Sprinkle with festive sprinkles if desired and place on a piece of plastic wrap to cool and set.
Alternatively, place the melted chocolate in a piping bag and drizzle the melted chocolate over each cookie.
Common Challenges
My shortbread cookies spread in the oven
This is a challenge for shortbread and sugar cookies. To fix this you will need to chill the dough first before baking. Either by placing them in the refrigerator or in the freezer.
Since we slice and bake these cookies straight from the refrigerator, they should be already to go directly into the oven.
My shortbread cookies are crumbly
In general, shortbread are a very delicate cookie. If your cookies are excessively crumbly there are probably one of two things going on. The dough is too dry, or you did not leave the cookies to cool completely on the tray before moving them.
Cookies that are too dry, need more butter added in to bind the dry ingredients together. Add butter in a little at a time until you have a dough that will hold together. Then make sure you let the cookies cool on the tray completely, before moving them.
Sugar for Mint Shortbread Cookies
What sugar to use for shortbread cookies. Icing sugar, white sugar, or brown sugar. Well, this is really dependant on the recipe. The sugar does change the texture and the flavour of the cookies.
I have added icing sugar to this recipe in combination with white sugar. Icing sugar contains cornstarch, which gives these cookies a delicate melt-in-your-mouth texture.
Some shortbread recipes add in rice flour to achieve a similar result. But since icing sugar is more readily available, that’s what is used for this recipe.
Brown sugar can also be interchanged with the white sugar in this recipe, if you prefer the flavour.
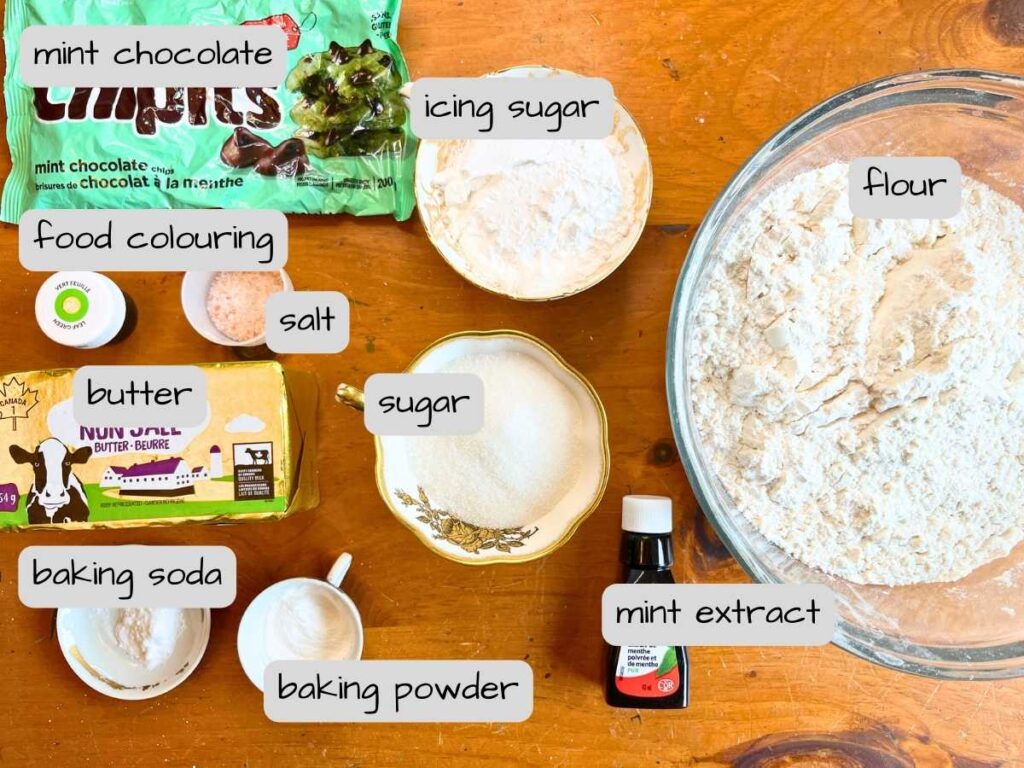
Ingredients for Mint Shortbread Christmas Cookies
2 cups of butter, softened 450 g
½ cup white sugar 100 g
½ cup icing sugar 65 g
1 Tablespoons mint extract 15 ml
1½ teaspoons baking powder 7 g
½ teaspoon baking soda 2 g
½ teaspoon salt 2 g
4 cups all-purpose flour 600 g
a few drops of green food colouring
2 bags mint chocolate chips 400 g
Sprinkles (optional)
Method
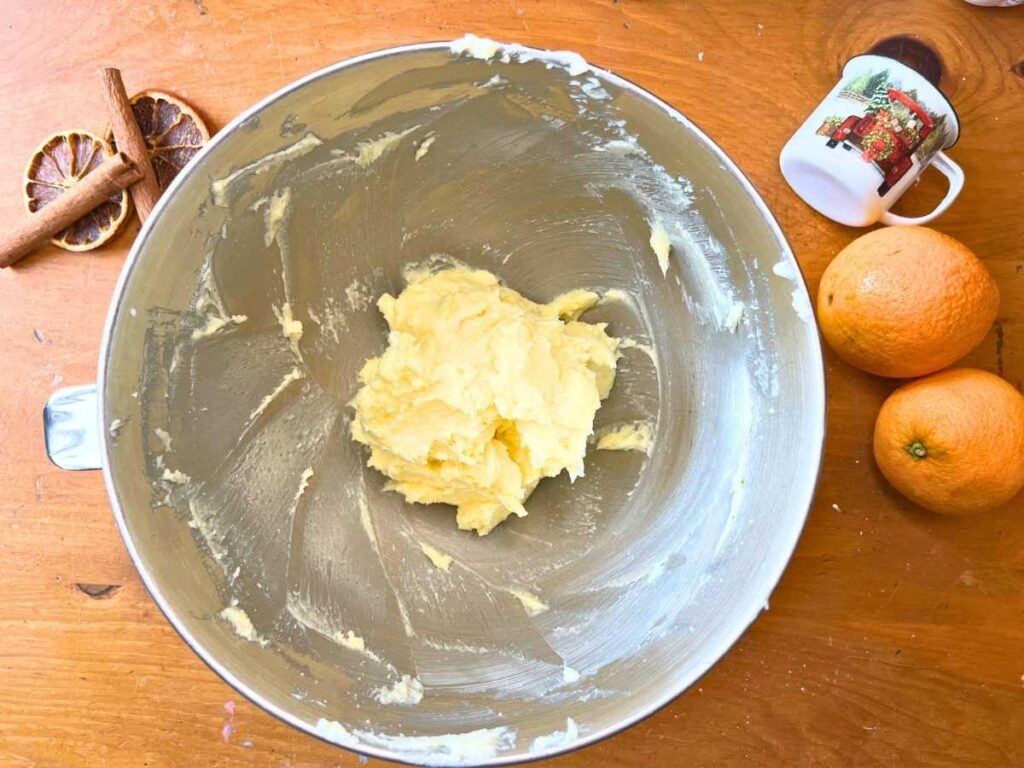
- In a large bowl, beat the butter until soft.
- Cream the butter and the sugars together until light and fluffy. This may take a few minutes. The butter should be almost white in colour.
- Mix in the mint extract.
- Mix in the baking powder, baking soda, salt, flour and green food colouring. Mix until the dough just comes together. Don’t over mix the dough or the cookies will become tough.
- Place a piece of plastic wrap on the counter and form half of the dough into a log shape. Wrap the dough log in the plastic wrap and roll it a few times on the counter to smooth it into a cylinder. Repeat with the second half of the dough.
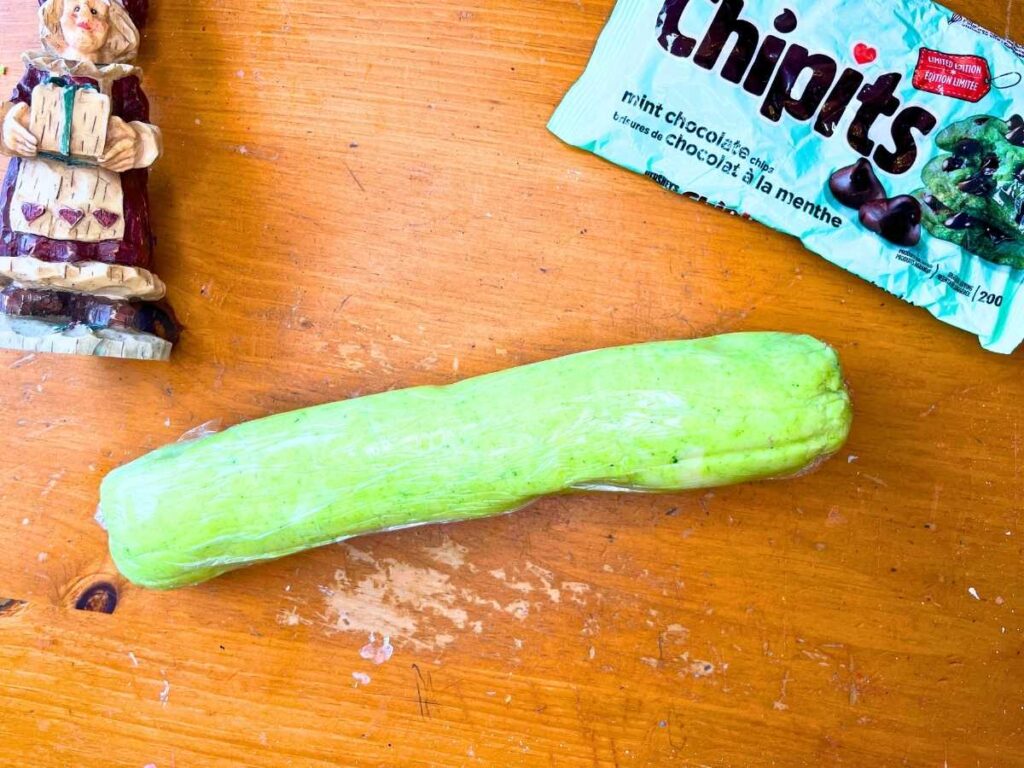
6. Place the two dough logs in the refrigerator for 2-3 hours, or overnight. Or place the dough in the freezer for 45 minutes.
7. Preheat the oven to 300 °F (150 °C).
8. Slice the logs into ¼-in. thick cookies. Turn the log every few slices to keep it from becoming flat on one side.
9. Place the cookies onto a lined baking sheet. Bake for 20-25 minutes.
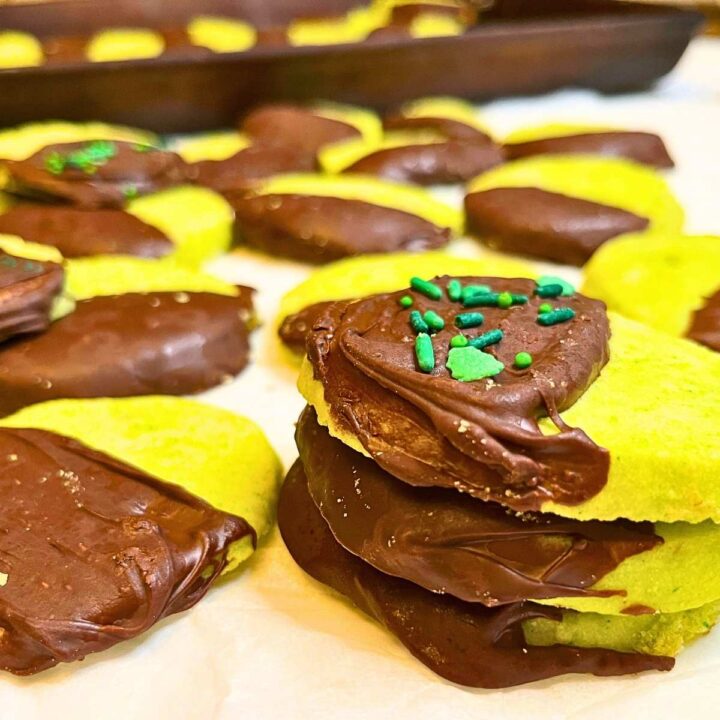
10. Cool for a few minutes on the tray and then remove to a wire rack to cool completely before decorating.

Decoration
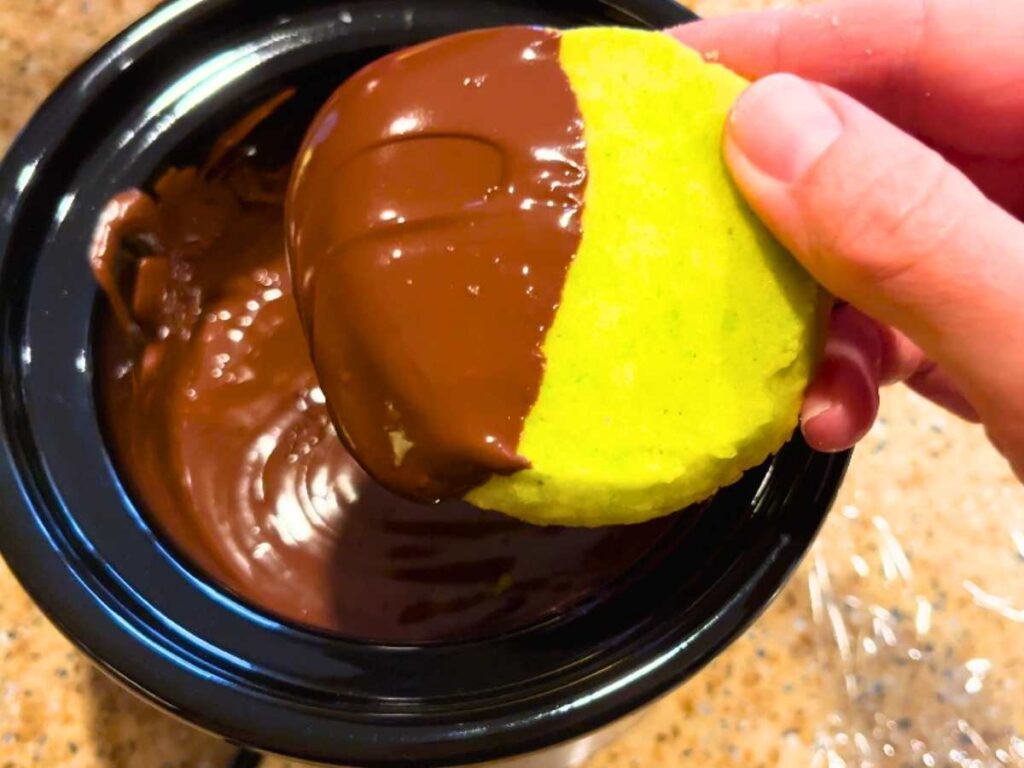
- Melt the mint chocolate or candy melts.
- Dip one side of the cookie into the melted chocolate. Place the cookie on a piece of plastic wrap, on the counter, to cool and set.
- Or place the melted chocolate into a piping bag and decorate each cookie.
- Decorate with sprinkles, if desired.

Easy Mint Shortbread Cookies
Tender melt-in-your mouth shortbread cookies infused with intense mint and dipped in chocolate. These easy to make cookies are the perfect festive cookie for the holidays!
Ingredients
- 2 cups of butter, softened 450 g
- ½ cup white sugar 100 g
- ½ cup icing sugar 65 g
- 1 Tablespoons mint extract 15 ml
- 1½ teaspoons baking powder 7 g
- ½ teaspoon baking soda 2 g
- ½ teaspoon salt 2 g
- 4 cups all-purpose flour 600 g
- a few drops of green food colouring
- 2 bags mint chocolate chips 400 g
- Sprinkles (optional)
Instructions
- In a large bowl, beat the butter until soft.
- Cream the butter and the sugars together until light and fluffy. This may take a few minutes. The butter should be almost white in colour.
- Mix in the mint extract.
- Mix in the baking powder, baking soda, salt, flour and green food colouring. Mix until the dough just comes together. Don't over mix the dough or the cookies will become tough.
- Place a piece of plastic wrap on the counter and form half of the dough into a log shape. Wrap the dough log in the plastic wrap and roll it a few times on the counter to smooth it into a cylinder. Repeat with the second half of the dough.
- Place the two dough logs in the refrigerator for 2-3 hours, or overnight. Or place the dough in the freezer for 45 minutes.
- Preheat the oven to 300 °F (150 °C).
- Slice the logs into ¼-in. thick cookies. Turn the log every few slices to keep it from becoming flat on one side.
- Place the cookies onto a lined baking sheet. Bake for 20-25 minutes.
- Cool for a few minutes on the tray and then remove to a wire rack to cool completely before decorating.
Decoration
- Melt the mint chocolate or candy melts.
- Dip one side of the cookie into the melted chocolate. Place the cookie on a piece of plastic wrap, on the counter, to cool and set.
- Or place the melted chocolate into a piping bag and decorate each cookie.
- Decorate with sprinkles, if desired.
Notes
This is a great freezer friendly recipe to get a head start of holiday baking!
Nutrition Information
Yield
60Serving Size
1Amount Per Serving Calories 134Total Fat 8gSaturated Fat 5gTrans Fat 0gUnsaturated Fat 3gCholesterol 16mgSodium 77mgCarbohydrates 15gFiber 1gSugar 7gProtein 1g
Keep the Christmas baking going! Hop over here for more inspiration!
Don’t forget to download the FREE ebook, full of Christmas cookies and holiday bakes. This is the only recipe book you’ll need this holiday season!


These sound like a Andes thin mint! Must try!