

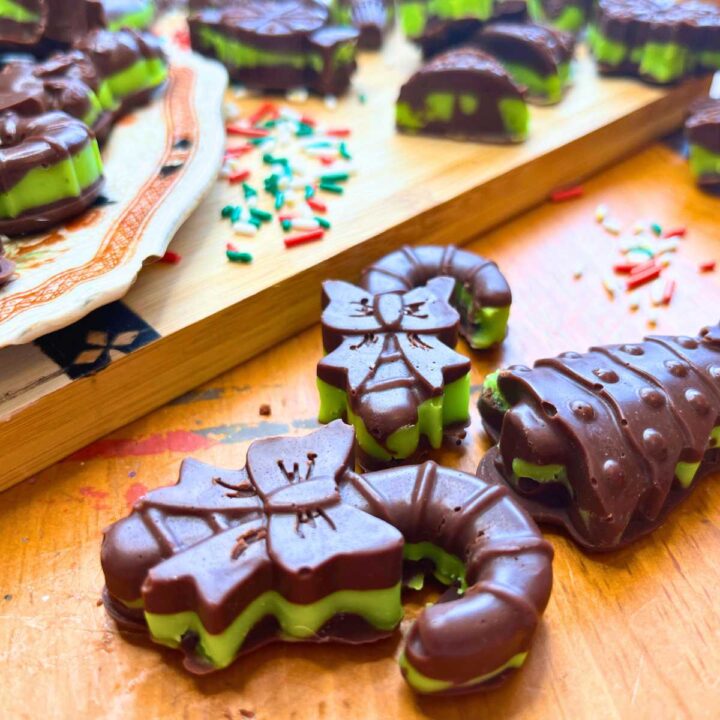
Simple layered chocolate mint candy
By Rebecca St. Clair
What says Christmas more than homemade candies and cookies? This simple layered chocolate mint candy recipe is one of my favourites.
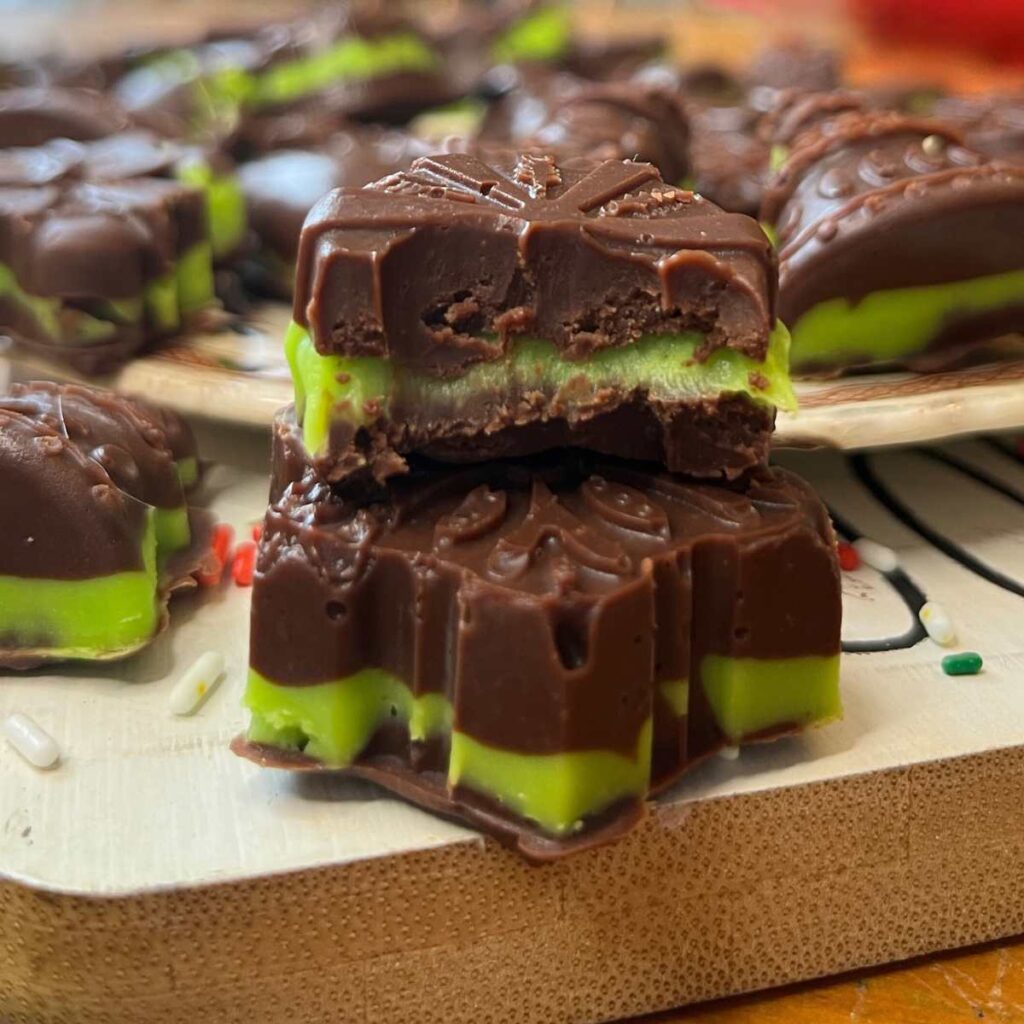
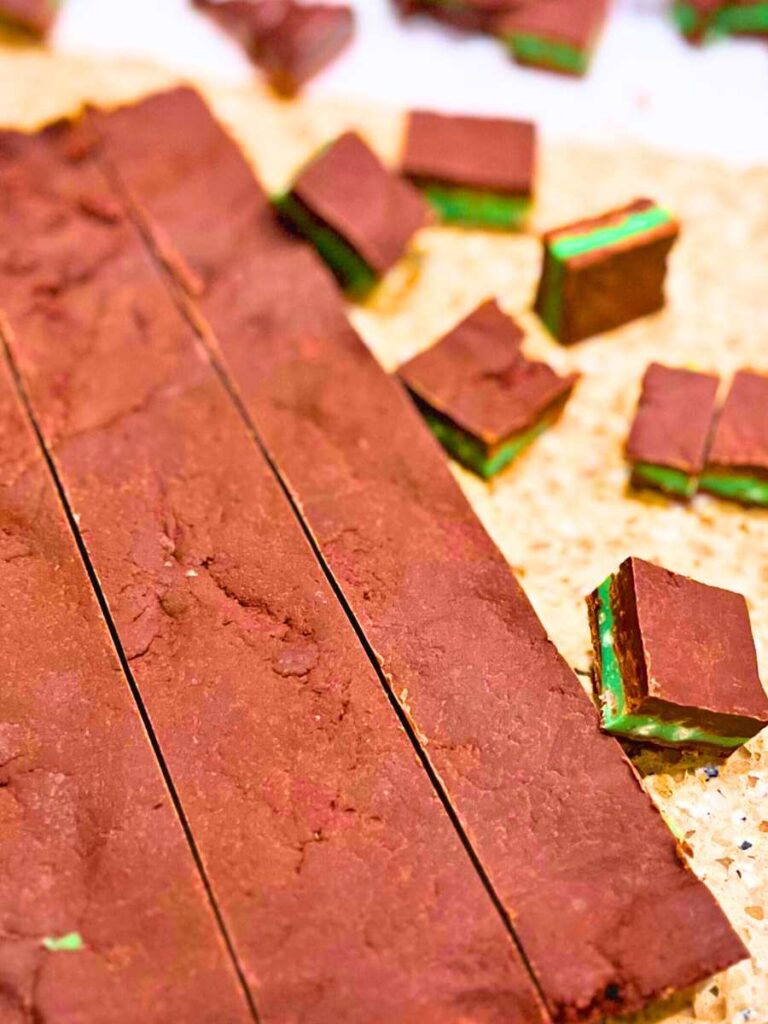
Not only are these Christmas chocolates quick and simple to make, but they tastes amazing! I have made these candies by dumping everything into a square container then, after chilling, slice into bite sized squares and serve. To make it a little more fancy, I have also used silicone candy molds. After chilling, pop out each individual candy and they look gourmet!
Simple layered chocolate mint candy are perfect Christmas sweets to make and bring to a Holiday party, or as a special treat in a Christmas cookie tin!

How to make Simple layered chocolate mint candy
These chocolates are so easy to make because they only have two parts with a short list of ingredients!
After melting and mixing the first semi-sweet mint chocolate layer, place half in the molds or container. Mix the second white chocolate layer, spread on top of the first. Then place the final semi-sweet chocolate layer and chill until set.
Once set, you simply need to cut the chocolates into bite sized squares or pop them out of their festive molds. You don’t even need to bake them! So simple!
Allergens
You will have to check each brands label, but generally speaking, simple layered chocolate mint candy is gluten free, nut/peanut free. The chocolate and sweetened condensed milk contains dairy.
Storing simple layered chocolate mint candy
Freezer storage
This simple chocolate treat freezes extremely well. To freeze your candies,
- Allow the finished candies to set. Cut or removed from the molds
- Freeze the candies in singled layer on a lined baking sheet for 1 hour
- Store the chocolates in an air-tight container
- Freeze for up to 3 months
Fridge storage
For shorter storage, place the chocolates in an airtight container. Store in the refrigerator for up to 2 weeks.

Substitutions
Mint chocolate chips can replace the semi-sweet chocolate chips in this recipe. Make sure to omit the addition of the mint extract in the original recipe.
Other Homemade Christmas chocolate candy flavours,
Orange and Chocolate- This flavour combination is another classic at Christmas time. Replace the mint extract in this recipe with 1 teaspoon of orange extract, depending on how strong you like the orange flavour. Replace the green food colouring with orange food colouring. Omit the crushed candy canes in the white chocolate layer.
Chocolate and Butterscotch/Caramel- For this flavour combination, replace the mint extract with vanilla extract. Substitute the white chocolate chips with butterscotch or caramel Chips. Omit the crushed candy canes. Add a sprinkle of coarse salt to the top of the candies, for salted caramel.
Chocolate Cheesecake- For this version, replace the mint extract with vanilla extract. Use half white chocolate chips and half cream cheese Chips. Yes, these exist! “Chocolate chips” have started coming out in all sorts of new flavours, colours, and shapes!
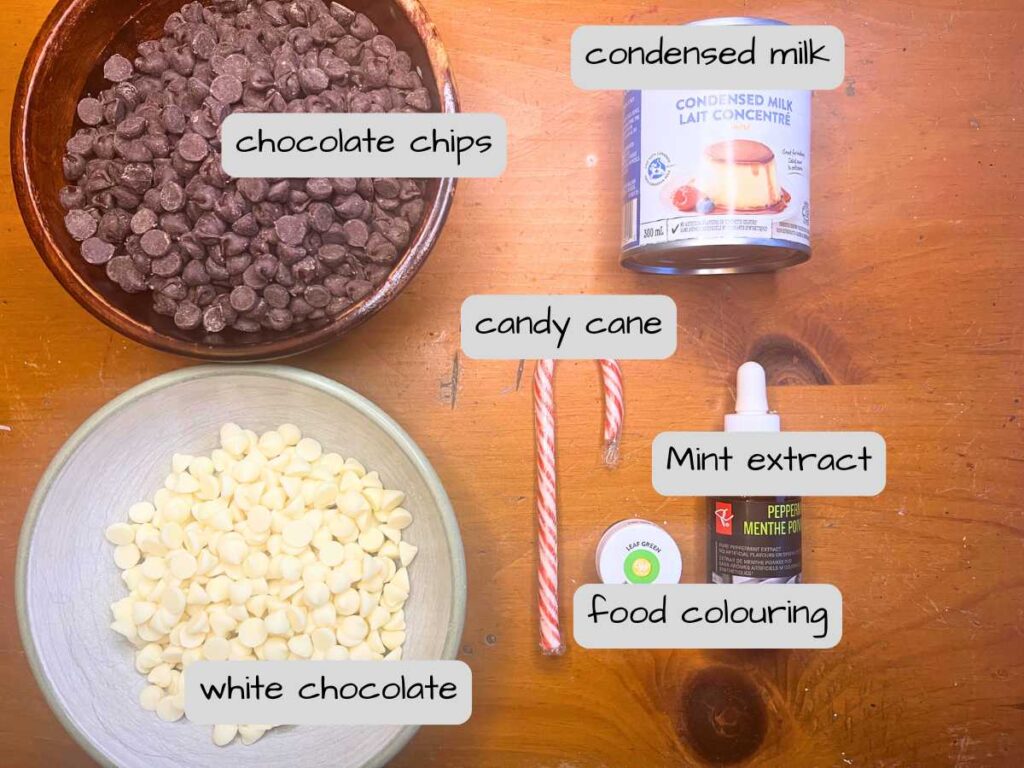
Ingredients for simple layered chocolate mint candy
2 (200 g) packages semi-sweet chocolate chips 400 g or 2 ½ cups
1 can sweetened condensed milk, divided
1 teaspoon mint extract 5 ml
One 200 g package white chocolate chips or 1 ¼ cups
1 teaspoon mint extract 5 ml
A few drops green food colouring (optional)
1 candy cane crushed (optional)
Method
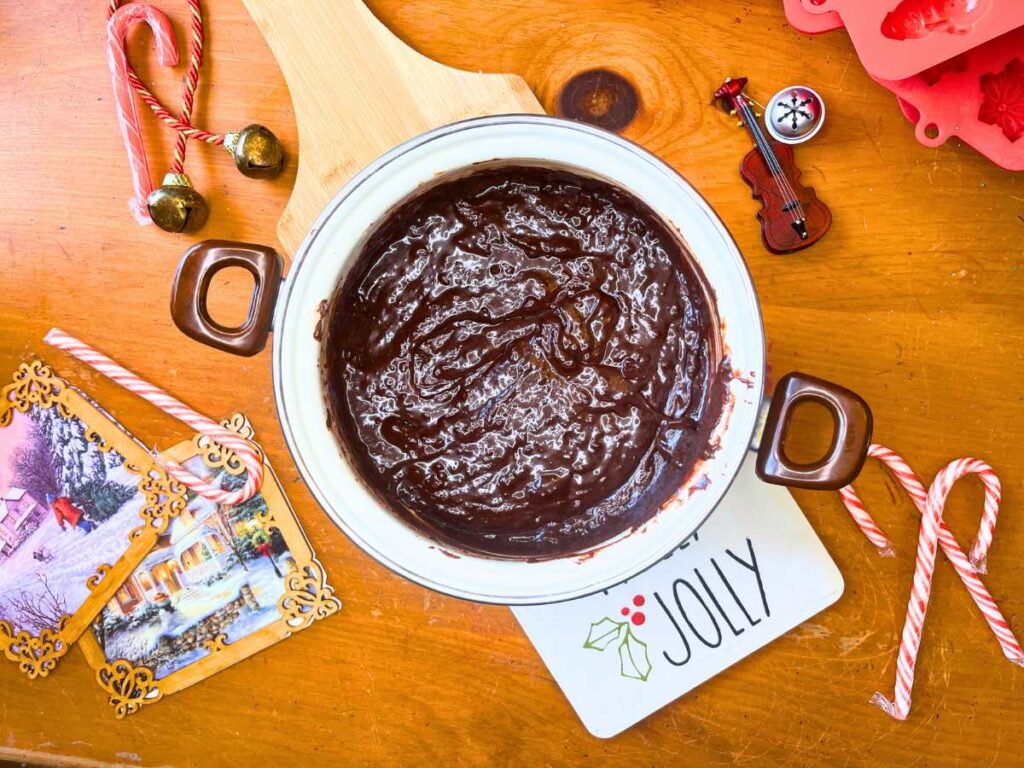
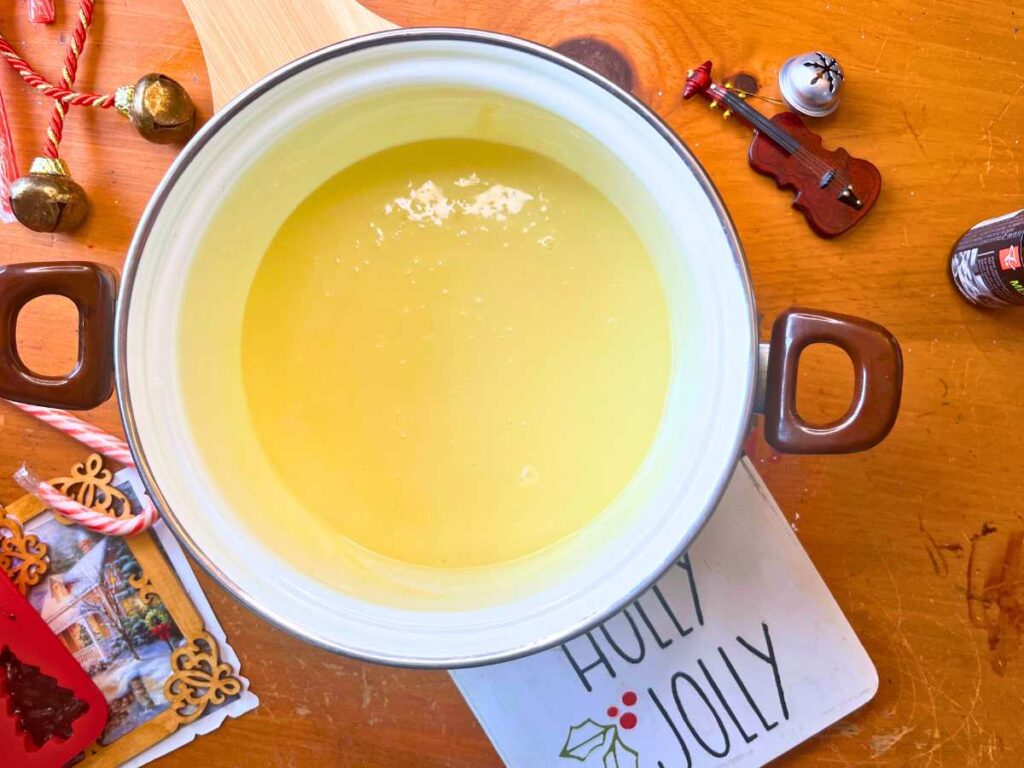
- In a medium sauce pot, over medium-low heat, melt the semi-sweet chocolate with 2/3 of the can of sweetened condensed milk.
- Stir in the mint extract and remove from heat.

3. Pour half of the mixture into a lined 8-in. square pan, spread out evenly.
4. In a medium sauce pot, over medium-low heat, melt the white chocolate chips with the remaining 1/3 can sweetened condensed milk, mint extract, and green food colouring (optional).
5. Remove from heat and stir in the crushed candy cane pieces (optional).
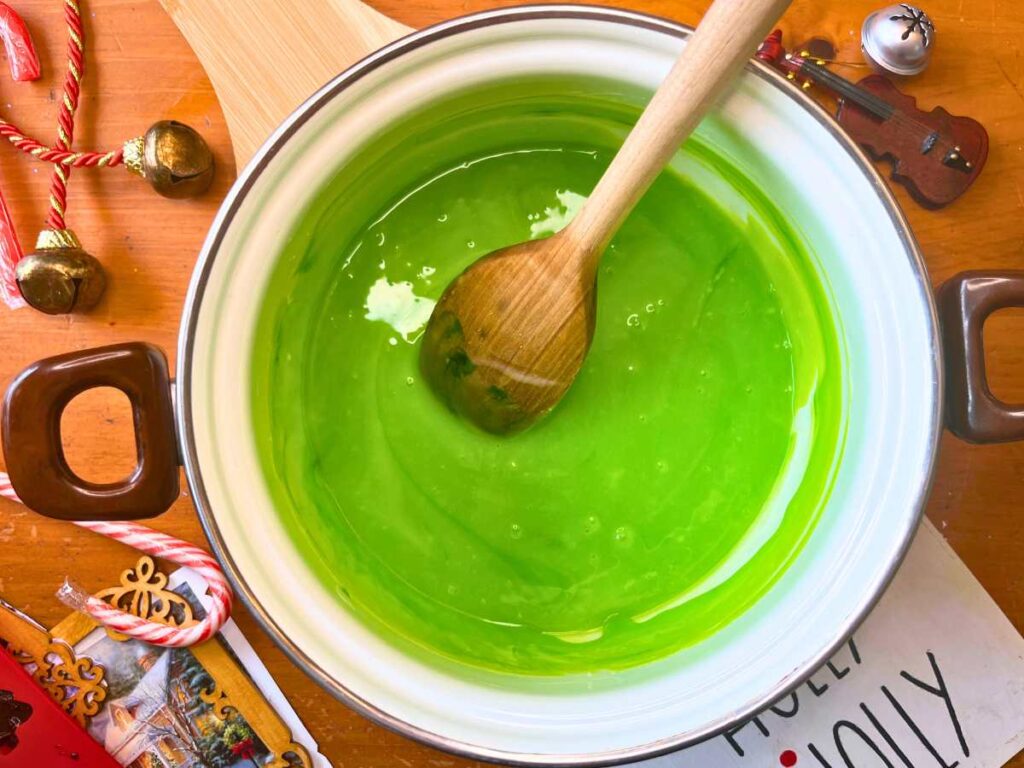
6. Spread this mixture over top of the semi-sweet chocolate layer.
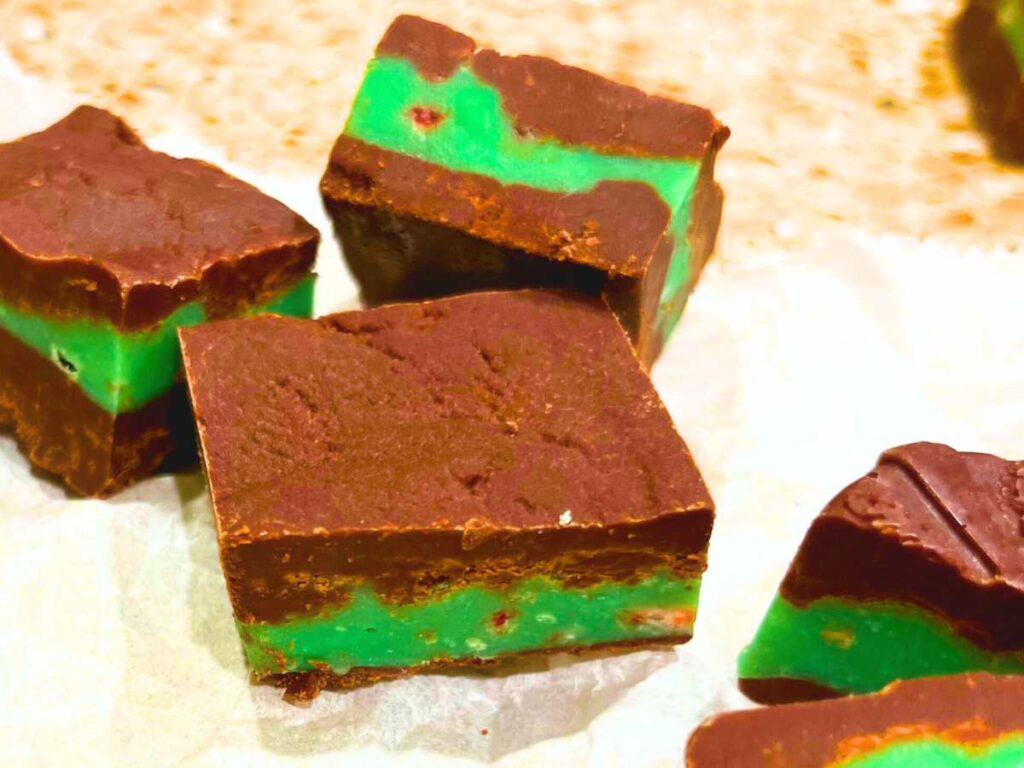
7. Spread on the remaining semi-sweet chocolate layer.
8. Chill in the fridge, until set.
9. Slice into bite-sized squares.

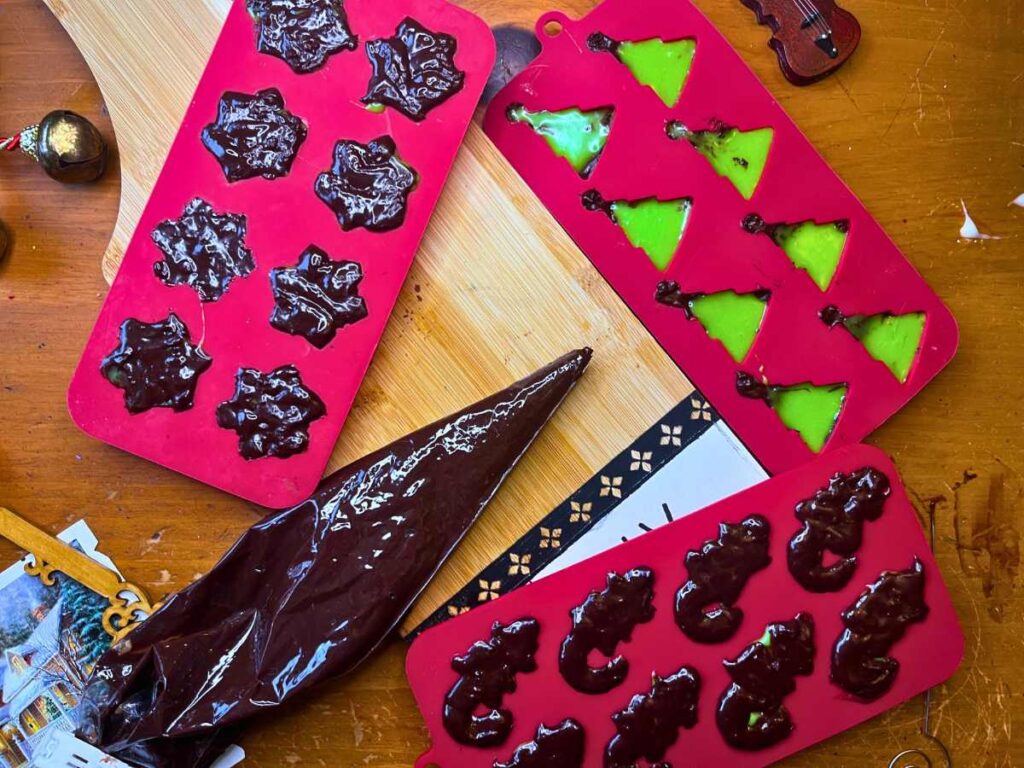
To make molded candies
- Place half of the semi-sweet chocolate mixture into a piping bag.
- Pipe into each mold, just under half full.
- Spread out the chocolate with a skewer or bang on the counter a few times to evenly distribute into the molds.
- Place the white chocolate layer into a piping bag and pipe a layer on top of the first chocolate layer in each mold. Make sure to leave enough space for the final layer.
- Spread out the white chocolate with a skewer or bang on the counter a few times to evenly distribute into the molds.
- Place the remaining semi-sweet chocolate into the piping bag and layer to fill each mold to the top.
- Spread out gently with a skewer or bang on the counter a few times to evenly distribute into the molds.
- Place in the fridge or freezer to chill until completely set.
- Remove from the molds and serve.

*Tip! – Keep a pot of simmering water near by. If the chocolate starts to solidify in the piping bags., carefully place the sealed bag into a mug of hot water. It will be ready for use again in 1-2 minutes!
*Decoration – Adding sprinkles to the top, before you set the 8-in. square chocolate dish in the fridge for it’s final set, is a fun and festive way to elevate the look of these chocolates.
Layered Chocolate Mint Candies
These little bite-sized candies are rich and decadent. Made of smooth mint chocolate. Perfect to bring to your next holiday party or to pop inside a Christmas cookie tin!
Ingredients
- 2 (200 g) packages semi-sweet chocolate chips 400 g
- 1 can sweetened condensed milk, divided
- 1 teaspoon mint extract 5 ml
- 1 200 g package white chocolate chips
- 1 teaspoon mint extract 5 ml
- A few drops green food colouring (optional)
- 1 candy cane crushed (optional)
Instructions
- In a medium sauce pot, over medium-low heat, melt the semi-sweet chocolate with 2/3 of the can of sweetened condensed milk.
- Stir in the mint extract and remove from heat.
- Pour half of the mixture into a lined 8-in. square pan, spread out evenly.
- In a medium sauce pot, over medium-low heat, melt the white chocolate chips with the remaining 1/3 can sweetened condensed milk, mint extract, and green food colouring (optional).
- Remove from heat and stir in the crushed candy cane pieces (optional).
- Spread this mixture over top of the semi-sweet chocolate layer.
- Spread on the remaining semi-sweet chocolate layer.
- Chill in the fridge, until set.
- Slice into bite-sized squares.
To make molded candies
- Place half of the semi-sweet chocolate mixture into a piping bag.
- Pipe into each mold, just under half full.
- Spread out the chocolate with a skewer or bang on the counter a few times to evenly distribute into the molds.
- Place the white chocolate layer into a piping bag and pipe a layer on top of the first chocolate layer in each mold. Make sure to leave enough space for the final layer.
- Spread out the white chocolate with a skewer or bang on the counter a few times to evenly distribute into the molds.
- Place the remaining semi-sweet chocolate into the piping bag and layer to fill each mold to the top.
- Spread out gently with a skewer or bang on the counter a few times to evenly distribute into the molds.
- Place in the fridge or freezer to chill until completely set.
- Remove from the molds and serve.
Notes
Keep a pot of simmering water near by. If the chocolate starts to solidify in the piping bags., carefully place the sealed bag into a mug of hot water. It will be ready for use again in 1-2 minutes!
Decoration - Adding sprinkles to the top, before you set the 8-in. square chocolate dish in the fridge for it's final set, is a fun and festive way to elevate the look of these chocolates.
Nutrition Information
Yield
60Serving Size
1Amount Per Serving Calories 54Total Fat 3gSaturated Fat 2gTrans Fat 0gUnsaturated Fat 1gCholesterol 1mgSodium 5mgCarbohydrates 7gFiber 0gSugar 6gProtein 1g
Craving some more easy Christmas baking ideas? These are some of my favourites! No-bake Rich Chocolate mint bars Christmas Cranberry Cheesecake Squares, Homemade Chocolate Truffles made with sweetened condensed milk

Grab this Christmas ebook for all of your Christmas baking needs!


I like this recipe and thanks, but can you use cup as well