
How to Make Homemade, Vintage, Christmas Garland
Homemade Vintage Garland is a fun DIY project that you can do with the whole family. This homemade vintage Christmas garland is made up of a few different element. You can use all or mix and match the ones you like.

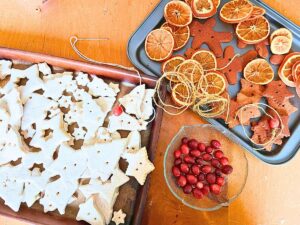
Elements in Homemade Vintage Garland
Garland with dehydrated orange slices
This is a simple natural element to add colour, and a lovely citrus smell, to the house. Dehydrated orange slices, if done properly, can last year after year. I have orange slice garland that I dehydrated at home 5 years ago. It is still in perfect condition!

Garland with salt dough
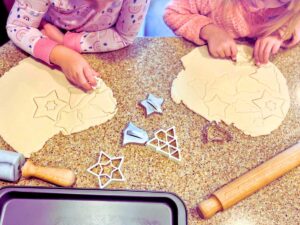
We used festive cookie cutters to cut out different shapes and sizes of salt dough decorations. We punched two holes beside each other, like a button hole. This will allow you to thread the decorations onto the garland and it will lay flat instead of on its side.
Make sure the hole is big enough to thread your needle and the type of string you want to use. We left our salt dough white, but they can be painted. I have salt dough ornaments that I made over 10 years ago and they are still holding up perfectly!

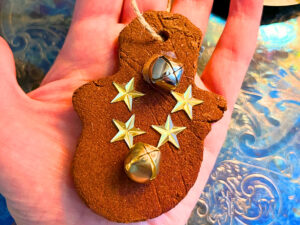
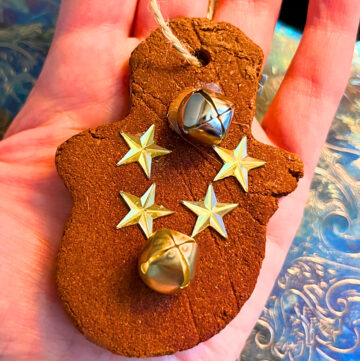
Cinnamon dough
My son made cinnamon dough ornaments in his class years ago. I had not seen it before and I though it was so amazing. I made sure to get the recipe from his teacher! Every year, when I open the bin, where I keep my ornaments, I can immediately smell that ornament!
Adding this to your homemade vintage garland will add a warm cinnamon spice aroma to your house! For these decorations we punched two holes beside each other, like a button hole. This will allow you to thread the decorations onto the garland. It will lay flat instead of on its side. Make sure the hole is big enough to thread your needle and the type of string you want to use.
I did this in the exact same way I did the salt dough. These ornaments also have a very long shelf life. The original ornament my son made is more than 5 years old and it is still perfect.
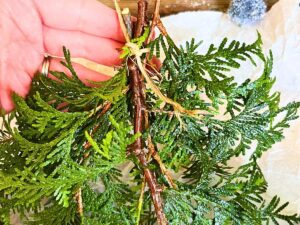
Fresh and foraged elements
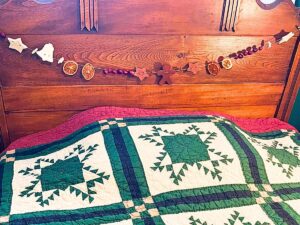
Adding things like pinecones, pieces of evergreen, dried flowers, popcorn, and cranberries are all great elements that work well with this project. Some things will have to be removed when their shelf life comes to an end, but you can reapply new ones year after year.
How to assemble Homemade Vintage Garland
String
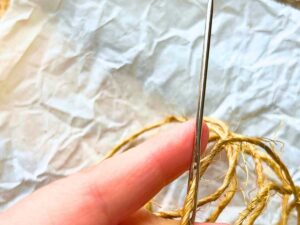
A thin and sturdy string, or cord, is needed for this project. I have used a thin jute twine, kitchen twine, and embroidery floss. Whatever you choose, make sure it is sturdy enough to hold all the decorations, but thin enough to thread through a needle.
Needle
For this project I used a sharp darning needle. The needle needs to have a big enough eye to thread the type of string you have chosen. A larger needle is best, as they will generally have a bigger eye. Darning needles, and upholstery needles will work well for this project.
Elements
Prepare your elements and lay everything out in groups. Thread your first element onto the string. Leave enough room at the end to tie it up for display. Tie a double knot around the first element to secure it in place.
Thread your elements on in any order you choose. Finish when you still have enough room at the end to tie it up for display. Tie the string onto the final element to secure it in place.
For cranberries, pierce the needle through the centre of the cranberry and thread it down the string.
For pinecones, wrap the string around the pinecone and tie it tight. The string should make its way in between all the little groves of the pine cone and be quite secure. You will not be threading this so tie it in the exact place you want it on the garland.
Evergreen pieces, and dried flowers should be tied to the garland as well. Or group them and tie before. Then you can thread the needle through the tie to attach them to the garland.
Popcorn can be pierced with the needle and threaded onto the string.
Dried orange slices can be pierced with the needle, near the top. Pierce the needle through again to make a loop and tie it at the top. This will allow your orange slices to lay flat instead of turning to the side.
Both dough elements can be threaded on with the needle going through the holes you made before baking them.
Dehydrating orange slices for homemade vintage garland

Ingredients
Oranges
Method
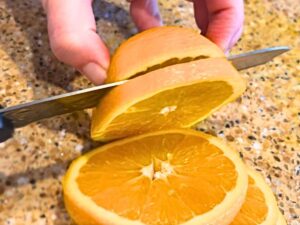
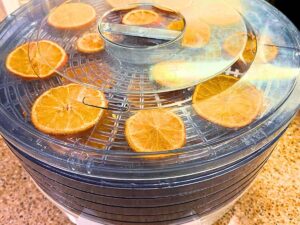
- Thinly slice oranges with a sharp knife. Place, spread out, on the tray of your dehydrator. Dehydrate the amount of time listed on your dehydrator.
- Once the moisture is removed from your slices, remove them from the dehydrator and place them in an air-tight container until ready for use.
Alternatively, you can bake your orange slices in your oven at 200 degrees F (90 degrees C) until all of the moisture is remove from the slices. This will take several hours, depending on the thickness of you orange slices.
Salt dough for homemade vintage garland
Ingredients for salt dough
4 cups all-purpose flour 600 g
1 cup table salt 288 g
1 ½ cups warm water 375 ml
Method
- In a large bowl, mix the flour and salt.
- Add in the water and stir to combine.
- When it starts to form a dough, tip it out onto the counter and knead it until it is a smooth soft dough. (1-2 minutes) If you find the dough is still very sticky, a little at a time, knead in more flour. If the mixture is very dry, wet your hands and knead the moisture into the dough until it is a smooth, soft dough.
- Let the dough rest about 5 minutes.
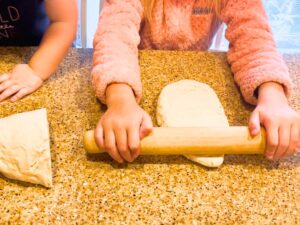
- Roll the dough out, with a rolling pin, to ¼-in. thick. Make sure to turn the dough several times to insure it is not sticking to the counter.
- Cut the dough out with cookie cutters, or cut out your design of choice. Or used this dough to press little hand prints, then simply cut around the print.
7. Gather the unused dough together and roll it out again. Continue to cut the dough into shapes. Do this until all the dough is used up.
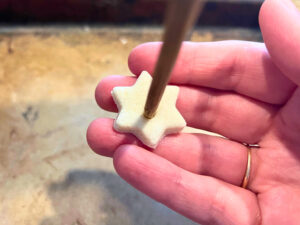
8. Using a kitchen skewer, or the end of a straw, poke the holes in the shapes needed to tread through a string after they are baked.
9. Preheat the oven to 250 °F (120 °C).
10. Place the dough shapes on a lined baking sheet. Bake for about 2 hours, depending on the size of your shapes. Larger shapes could take up to 3 hours.
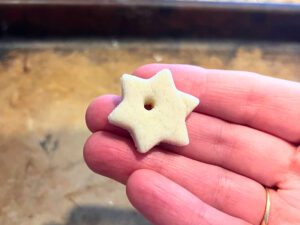
11. When the shapes are done, they should be white and set on both sides.
12. Let them cool completely before using.
Salt Dough
Equipment
- cookie cutters optional
Ingredients
- 4 cups all-purpose flour 600 g
- 1 cup table salt 288 g
- 1 ½ cups warm water 375 ml
Instructions
- In a large bowl, mix the flour and salt.
- Add in the water and stir to combine.
- When it starts to form a dough, tip it out onto the counter and knead it until it is a smooth soft dough (1-2 minutes). If you find the dough is still very sticky, a little at a time, knead in more flour. If the mixture is very dry, wet your hands and knead the moisture into the dough until it is a smooth dough.
- Let the dough rest about 5 minutes.
- Roll the dough out, with a rolling pin, to ¼-in. thick. Make sure to turn the dough several times to insure it is not sticking to the counter.
- Cut the dough out with cookie cutters, or cut out your design of choice.
- Gather the unused dough together and roll it out again. Continue to cut the dough into shapes. Do this until all the dough is used up.
- Using a kitchen skewer, or the end of a straw, poke the holes in the shapes. These holes are needed to thread through a string, after they are baked.
- Preheat the oven to 250 ℉ (120 ℃).
- Place the dough shapes on a lined baking sheet. Bake for about 2 hours, depending on the size of your shapes. Larger shapes could take up to 3 hours.
- When the shapes are done, they should be white and set on both sides.
- Let them cool completely, before using them.
Cinnamon dough for homemade vintage garland
Ingredients for Cinnamon dough
1 cup plain applesauce 250 ml
1 ½ cups ground cinnamon 180 g
3 Tablespoons white liquid glue 45 ml
Method
- Combine all of the ingredients in a large bowl and mix to combine. The dough should be able to hold together when you pinch a clump in your fist.
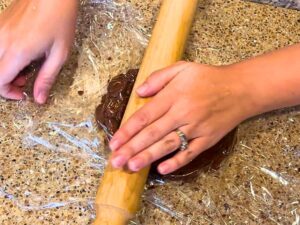
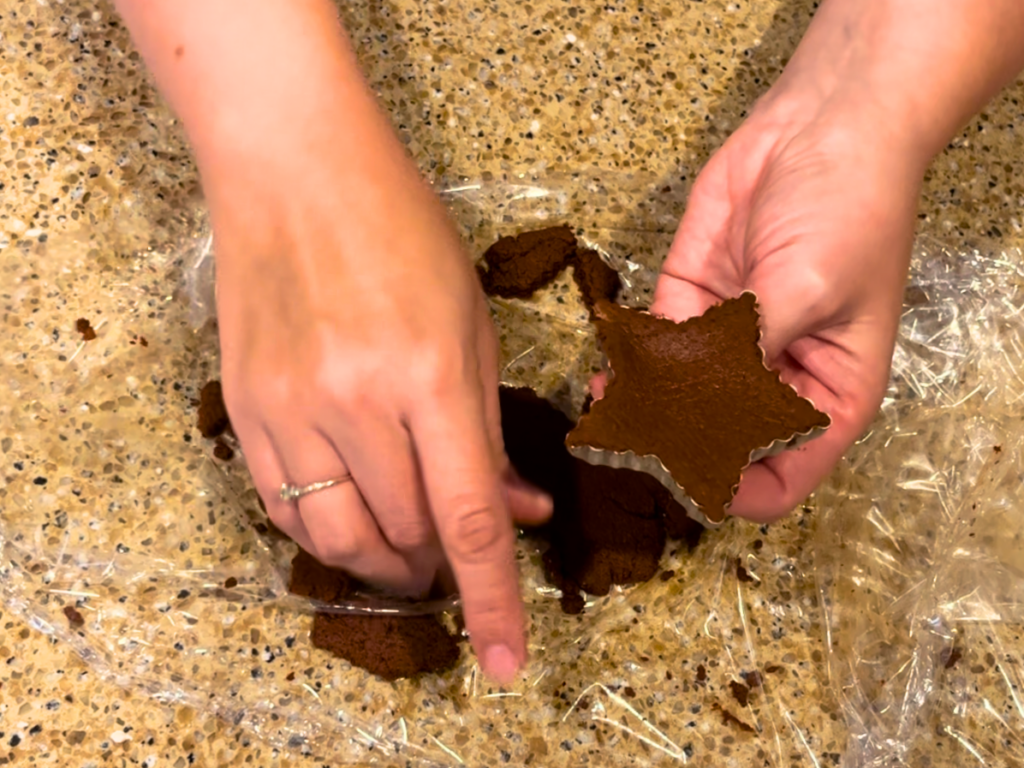
- Place the dough in between two pieces of cling-film. Roll it out with a rolling pin until it is about ¼-in. thick.
- Remove the top sheet of film and cut out into shapes, using cookie cutters.
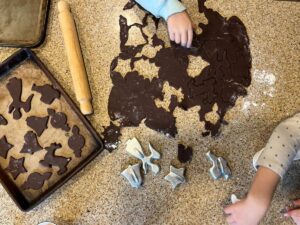
4. Remove the cut-outs, to a lined baking sheet. This dough is quite soft and does not hold together like flour dough. I find the best way to transfer to the baking sheet is to pick it up in the cookie cutters. Then, let it fall out of the cookie cutter onto the baking sheet.
5. Clump all the unused dough back together and roll out. Cut into shapes. Repeat this process until all the dough is used up.
6. Preheat the oven to 200 °F (95 °C).
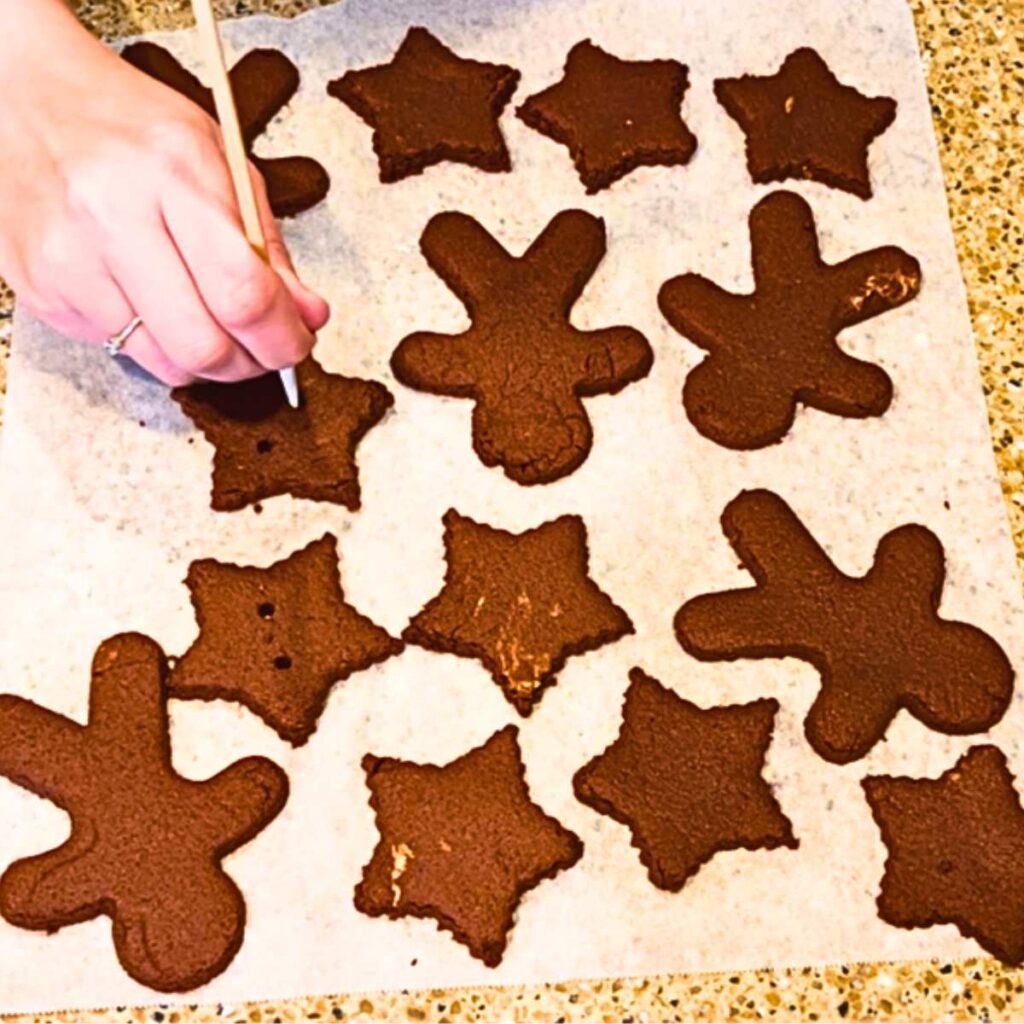
7. Poke holes through the cut-outs, using a kitchen skewer or straw. This is so you can thread a string through it when they are baked.
8. Bake until the dough is set and hard, (about 2 ½ – 3 hours) depending on the size and thickness of your dough.
9. Let cool completely before using or decorating.
Cinnamon Dough
Equipment
- cookie cutters optional
Ingredients
- 1 cup plain applesauce 250 ml
- 1 ½ cups ground cinnamon 180 g
- 3 Tablespoons white liquid school glue 45 ml
Instructions
- Combine all of the ingredients in a large bowl and mix to combine. The dough should be able to hold together when you pinch a clump in your fist.
- Place the dough in between two pieces of cling-film. Roll it out with a rolling pin, until it is about ¼-in. thick.
- Remove the top sheet of film. Cut out into shapes, using cookie cutters.
- Remove the cut-outs to a lined baking sheet. This dough is quite soft and does not hold together like a flour dough. I find the best way to transfer to a baking sheet is to pick it up in the cookie cutter and then let it fall out of the cookie cutter onto the baking sheet.
- Clump all the unused dough back together and roll out. Cut into shapes. Repeat this process until all the dough is used up.
- Preheat the oven to 200 ℉ (95 ℃).
- Poke holes through the cut-outs, using a kitchen skewer or straw. This is so you can thread a string through when it is baked.
- Bake until the dough is set and hard, about 2 ½ – 3 hours, depending on the size and thickness of your dough.
- Let cool completely, before using or decorating.

Keep that festive spirit going! Try one of these great recipes to send to friends or snack on at home! Mint slice and bake Christmas Cookies The best soft and chewy gingerbread cookies Simple layered chocolate mint candy