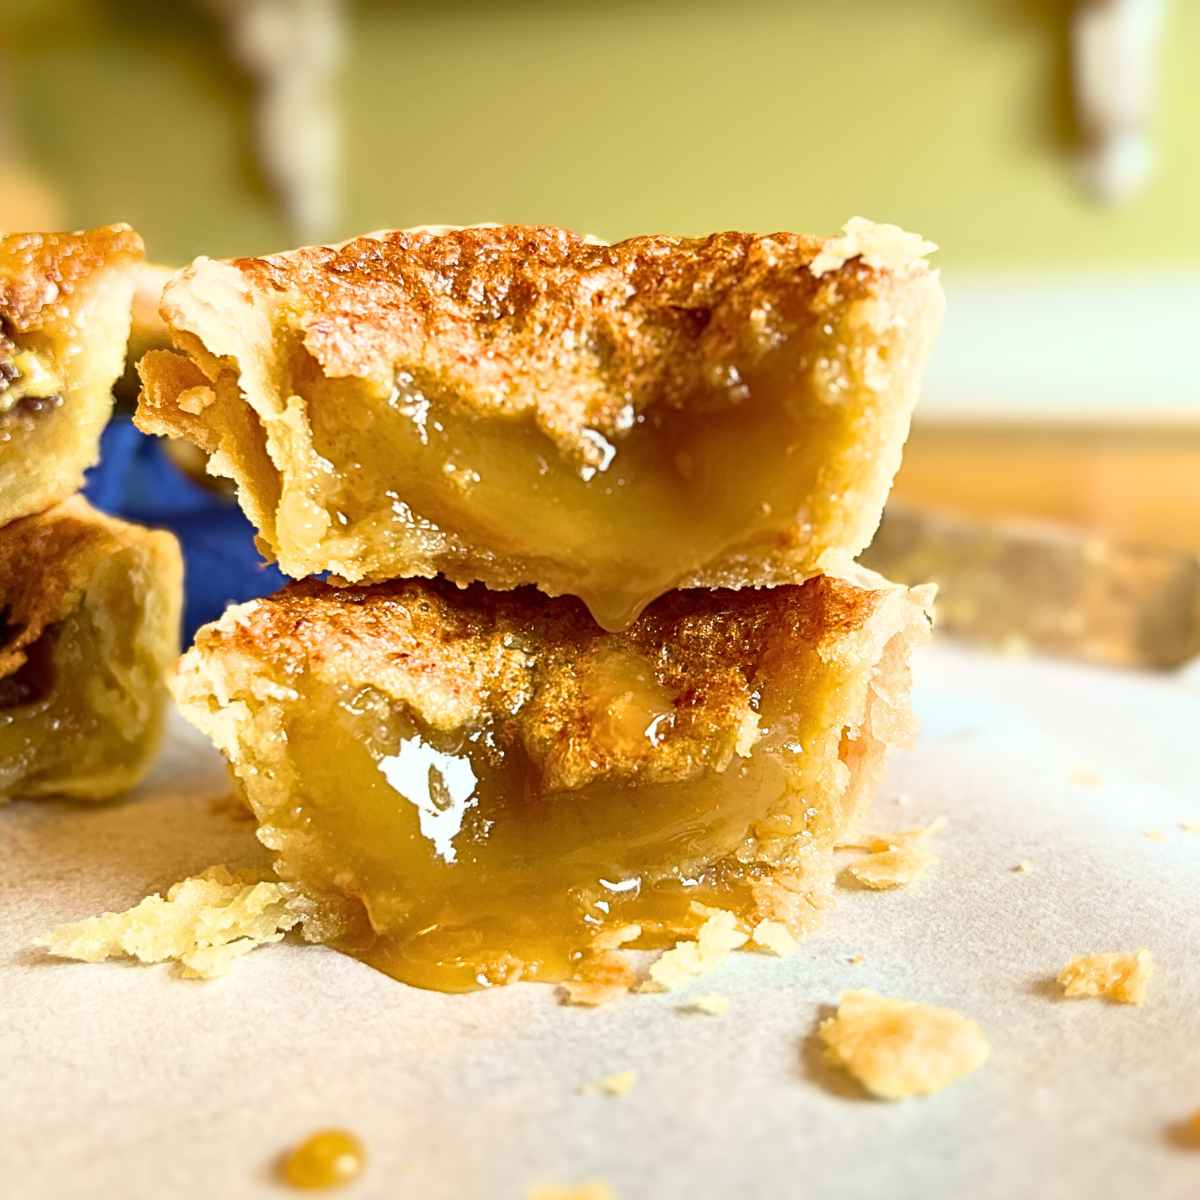
Maple Butter Tarts with runny filling
By Rebecca St.Clair
A homemade flaky pastry filled with a gooey sweet maple syrup centre! These Homemade Classic Canadian Butter Tarts are a favourite in our home! They can be made plain, with pecans, currents, or raisins. You can also play with the consistency of the filling. Some people love a runny filling and others swear by the stiff-filling tarts you can pick up and eat. It’s a bit of a debate. What is your favourite?

What are butter tarts
You would be hard pressed to find someone living in Canada who hasn’t eaten or at least heard of butter tarts.
This classic Canadian dessert can be found just about anywhere from the grocery store to a backyard barbecue. These little personal-sized pastries often make an appearance during special occasions but can be enjoyed any time of year!
If you have never had a butter tart before, they are similar in taste to sugar pie or pecan pie.

How to store butter tarts
Left out at room temperature
Left-over butter tarts can be stored, covered, on the counter top for 2 days. After that move any left-overs to a longer storage option.
Fridge
Yes, you can store your left-over butter tarts in the fridge.
- Place in an airtight container or cover with plastic wrap.
- Store in the fridge for up to 7 days.

How to freeze butter tarts
Butter tarts freeze well. Freezing is a great storage option if you want to make your butter tarts ahead of time. To store your butter tarts in the freezer,
- Place your tarts in a airtight container.
- Store in the freezer for up to 3 months.
- When you are ready to enjoy them, remove from the freezer and allow to defrost in the fridge for 24 hour.
- You can also uncover and allow to come to room temperature on the counter top over a few hours.

Butter tart variations
Like most traditional dishes, there are countless recipes and variations. Each one claiming to be the best. Butter tarts have not escaped this controversy! And butter tart lovers are very passionate on which side of the fence they fall, stiff or runny filling, raisins, nuts, or plain.
In this recipe we are making the runny filling version and to give them an even more Canadian feel, we’re making them with maple syrup. If you, however, prefer a more subtle flavour, just replace the maple syrup with more corn syrup.
As for the mix-ins, I’ll leave that up to you! Some people swear by plain butter tarts, without anything added in, just the pure sweet gooey filling. Others claim that raisins are a must for the perfect butter tart. If you want to add mix-ins the most popular are raisins, sultanas, currents, or chopped pecans.

Raisins, sultanas, and currents will all soak up some of the liquid as the butter tarts are baking, making the filling thicker and less runny. So keep that in mind when you are deciding on how thick you would like your butter tart filling to be.
The outside tarts in the muffin tin will cook quicker than the inside tarts, this will also make the filling of inside tarts thinner. You can remove the outside tarts first and then return the inside tarts to the oven if the filling is still not set.
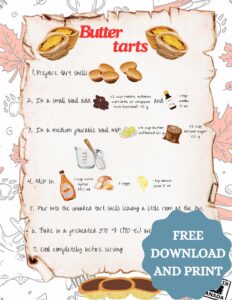
How to Make Maple Butter Tarts
Tart shells
- In a food processor, add the flour, sugar, and salt. Pulse to mix.
- Cut the cold butter into cubes, and drop it into the flour mixture, through the funnel, while the food processor is on low.


3. Mix the vinegar in with the water and add to the food processor, along with the beaten egg, through the funnel, while it is on low.
4. Mix a few seconds, until the dough just comes together.
5. Form into two disks and cover in plastic wrap. Refrigerate for 1 hour.


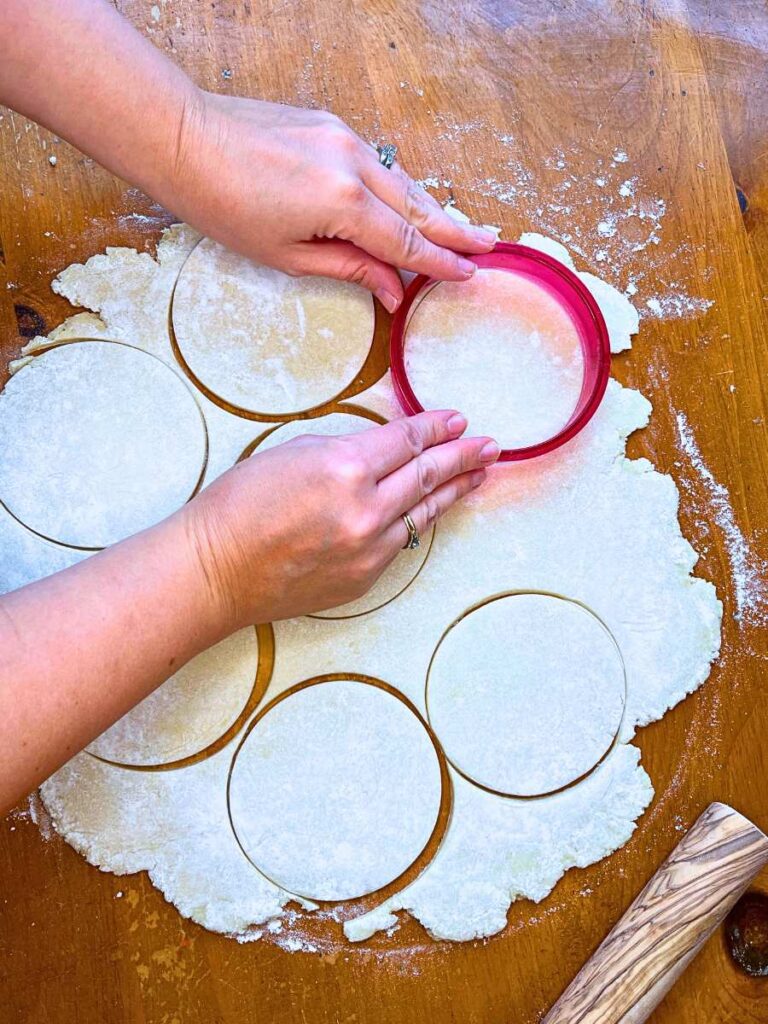
6. Remove from refrigerator and roll out on a lightly floured surface.
7. Cut into disks, with a large cookie cutter, a biscuit cutter, or the rim of a large cup.
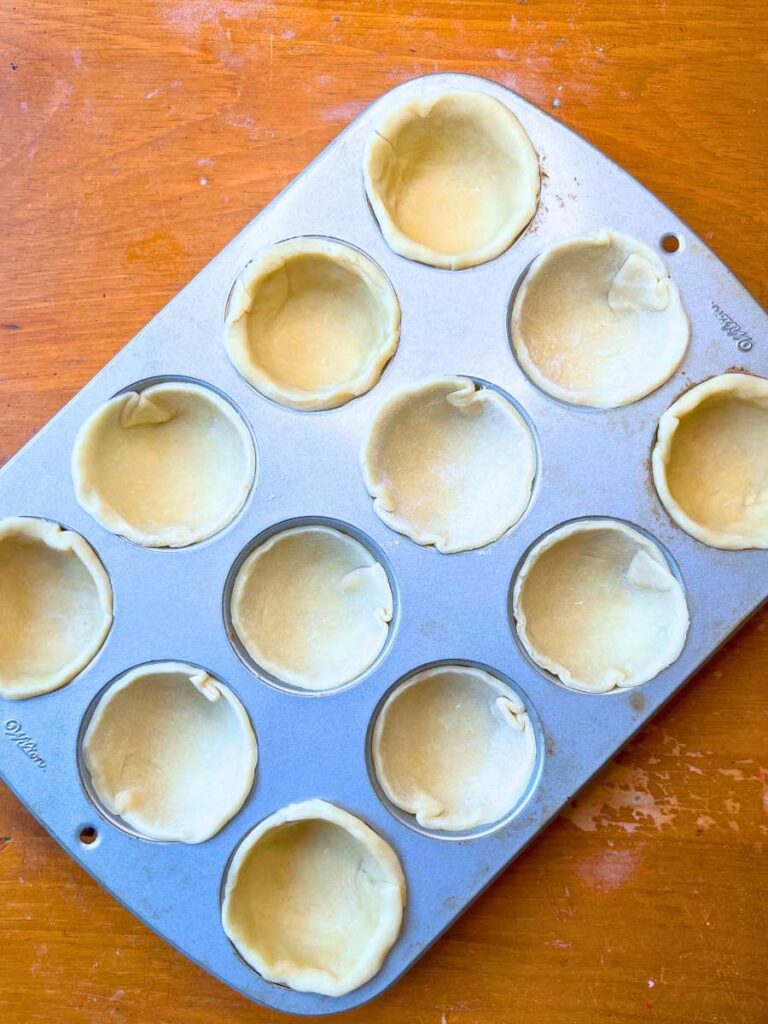
8. Form the dough disks into each cup of the muffin tin.
Maple Butter Tart Filling
- Preheat oven to 375 °F (190 °C)
- In a bowl that you can easily pour from, (I used a large glass measuring cup), add 1/4 cup melted butter, 1 cup brown sugar, 1/2 cup maple syrup, 2 eggs, and an 1/8 teaspoon of salt. Mix to combine.
- If using mix-ins, arrange these into the bottom of the tart shells.


4. Pour the filling into the tart shells, leaving 1/4-inch space at the top.
5. Bake 20 minutes or until the filling has puffed up and looks caramelized on top.
6. Remove from the oven and allow to cool to room temperature before serving.


Maple Butter Tarts - Runny Filling
A homemade flaky pastry filled with a gooey sweet maple syrup centre. They can be made plain, with pecans, currents, or raisins.
Ingredients
- Tart Shells
- 2 ¾ cups flour 410 g
- 1 Tablespoon white sugar 12 g
- 1 teaspoon salt 5 ml
- 1 cup unsalted butter, fridge cold 225 g
- ¼ cup cold water 60 mL
- 2 teaspoons vinegar 10 mL
- 1 egg
- ½ teaspoon baking powder 2.5 ml
- Filling
- 1/2 cup maple syrup 125 mL
- 1 cup brown sugar 200 g
- ¼ cup melted butter 60 ml
- 2 eggs
- 1/8 teaspoon salt
- ½ cup Mix-ins such as raisins, currents, sultanas, or chopped nuts (optional)
Instructions
- For the pastry. In a food processor, add the flour, sugar, and salt. Pulse to mix.
- Cut the cold butter into cubes, and drop it into the flour mixture, through the funnel, while the food processor is mixing on low.
- Mix the vinegar in with the water and add to the food processor along with the beaten egg, through the funnel, while it is mixing on low.
- Stop the food processor as soon as the dough comes together.
- Form into two disks and cover in plastic wrap.
- Refrigerate for 1 hour.
- Remove from refrigerator and roll out on a lightly floured surface.
- Cut into disks, with a large cookie cutter, biscuit cutter, or the rim of a large cup.
- Form the dough disks into each cup of the muffin tin.
Maple filling
- Preheat oven to 375 °F (190 °C)
- In a bowl that you can easily pour from, (I used a large glass measuring cup), add the butter, brown sugar, maple syrup, salt, and eggs.
- If using mix-ins, arrange these into the bottom of the tart shells.
- Pour the filling into the tart shells, leaving 1/4 inch of space at the top.
- Bake 20 minutes or until the filling has puffed up and is caramelized on top.
- Allow to cool to room temperature before serving.
Notes
Make sure to cool the tarts before serving. The sugar filling is extremely hot straight out of the oven.
The filling will set up slightly as it cools.
If you want to add mix-ins the most popular are raisins, sultanas, currents, or chopped pecans.
Nutrition Information
Yield
12Serving Size
1Amount Per Serving Calories 402Total Fat 22gSaturated Fat 14gUnsaturated Fat 9gCholesterol 102mgSodium 291mgCarbohydrates 47gFiber 1gSugar 30gProtein 4g
Nutrition information isn't always accurate.
If you are looking for some more Canadian cuisine you have to try Nanaimo bars or make this bread that is popular in the Canadian East-Coast! Old Fashioned Oatmeal Molasses Brown Bread.
Sign up for Email you’ll look forward to! Receive the latest and exclusive content straight to your inbox! Gain instant access to the exclusive FREE PRINTABLES!
Like this! Starting your own family cook book has never been easier!